This post may contain affiliate links.
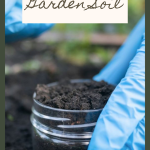
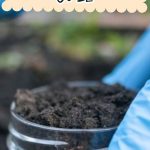

To ensure your vegetable garden thrives, starting with healthy soil is essential. Conducting a soil test should be an early step. The condition of your soil directly impacts nutrient availability, how well water is retained, and drainage.
Making the necessary improvements can be challenging without understanding your soil’s specific characteristics.
This guide will cover everything you need about soil testing, helping you make the right changes for a more productive garden.

Why Test Garden Soil?
Testing your soil is important for a few key reasons. First, it helps you understand the nutrient makeup of your soil, showing you what nutrients are available and what’s missing. This knowledge guides you in how to enrich your soil for better plant health.
Second, soil testing determines your soil’s pH level, indicating its acidity or alkalinity. Since different plants thrive in different pH environments, this information is vital for selecting the right plants for your garden or adjusting the soil pH as needed.
Lastly, the test will tell you about your soil’s texture by measuring the amounts of sand, silt, and clay. Understanding your soil’s texture affects how you manage it, considering factors like root growth, water drainage, and soil compactness. With this insight, you can modify your soil to support your plants better.
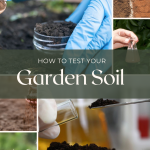
How to Test Your Garden Soil
There are a few different ways to test your soil, and you may want to use a combination of methods to get a true understanding of what you are working with.
Option 1: Using A Soil Test Kit

One option is to purchase a soil test kit from your local garden center, hardware store, or online. You can also often request these kits from a local University Extension Office at a discounted cost or for free.
These kits generally contain a collection of tests that will give you the above information—nutrient quantities, acidity, etc. They work by adding a small amount of soil to a provided container, then adding water and chemicals that change color to indicate the presence of different nutrients. The included guide will help you interpret these results.
A soil test kit is the best means for understanding the nutrient composition of your soil, whereas many tests can be used to learn more about the density and physical characteristics of your garden soil.

Unlock Your Lawn & Garden Potential, Complete & Accurate Nutrient and pH Analysis with Recommendations Tailored to Your Soil and Plant Needs
Option 2: Testing Soil Without a Test Kit
If you don’t want to purchase a test kit or if you want to know more than the test tells you, there are several tests you can do at home to get a general idea of your soil’s condition.
Testing by Observation

One simple “test” is to look at the color of your soil. Healthy soil will be dark brown or black and have an earthy smell. Sandy soil will be light-colored, while clay soil will be heavy and dense.
You can also observe a soil test in a jar. For this test, you will need a quart-sized Mason jar, some soil, and water. Fill the jar with soil to within an inch of the top, then add water until it is just below the top of the soil. Stir well and let sit for 24 hours. The next day, look at how much sediment has settled on the bottom of the jar.
If most of the soil is still suspended in the water, your soil has a high sand content. If the sediment takes longer than a day to settle, you have clay soil. If the sediment settles within an hour or so and there is still some water above the sediment, your soil has a good mixture of sand, silt, and clay.
Testing by Feel

Another way to test your soil is to feel it between your fingers. Try this with a handful of soil from different parts of your garden. Soil rich in organic matter will be soft and spongy, while depleted soil will be hard and crumbly.
A ribbon test is another texture-based test you can do with your fingers. Take a small handful of soil and add enough water to form a ball in your hand. Then, try to make a ribbon out of the ball. If it breaks easily, your soil is sandy.
If it’s hard to form a ribbon or if the ribbon is crumbly, your soil contains clay. If the ball forms a ribbon but doesn’t break easily, you have loamy soil, which is ideal for gardening.
Testing by Smell

One of the most telltale signs of a soil issue is its smell. If your soil smells sour, it may have an acidic pH unsuitable for plants. A sweet smell could indicate high nitrogen levels in the soil, which can be harmful to plants if present in large quantities.
Testing The Ph of your Soil with Vinegar

Another way to test the pH of your soil is with vinegar. Add one tablespoon of white distilled vinegar to a quart of water and mix well.
Add a sample of soil from your garden to the mixture. If the soil fizzes, it has a high acidity and may not be suitable for all gardening (but it might be great for things like blueberries!). If the soil doesn’t fizz, it has a low acidity and is more suitable for gardening.
Percolation Test

A percolation test shows how well your soil drains. This is an important factor to consider when gardening, as plants need access to both water and air. To do this test, dig a hole 12 inches deep and at least 18 inches wide. Fill the hole with water and let it drain for 30 minutes. Then, fill the hole with water again and let it drain for another 30 minutes.
After the second draining, measure the depth of the water in the hole. Your soil drains well if the water has drained more than six inches in two hours. If it has drained less than three inches, your soil doesn’t drain well, and you may need to improve it before gardening.
Soil Compaction Test

One final test you can do at home is a soil compaction test. This is especially important if you plan on growing vegetables, as compacted soil can make it difficult for roots to grow.
To do this test, take a screwdriver or other sharp object and push it into the ground. If pushing in more than six inches is difficult, your soil is compacted. You can improve the soil by adding organic matter such as compost or mulch.
Once you have the soil testing results, you can search for more information on amendments that will help you address each component of your soil health (click here for information on increasing nitrogen levels, for example). Knowing what to look for is an important first step!
No matter which method you choose, taking the time to test your garden soil will help you make informed decisions about improving its health and supporting healthy plant growth. By understanding what’s in your soil and how it reacts to different conditions, you can create a thriving garden better able to withstand pests, diseases, and extreme weather.
Now that you know how to test your garden soil, are you ready to start? Please share your results in the comments below and let us know how your garden grows!
Happy gardening!
More Articles on Garden Soil Health
- How to Increase Nitrogen Levels in your Soil: Natural Methods
- How to Use Eggshells in the Garden
- How to use the Sheet Mulch Method to Create a Garden Bed
- No-Dig Gardening (Book Review)
Carrie Williams Howe is an educational leader by day and an aspiring homesteader by night and weekend. She lives on a small homestead in Vermont with her husband, two children, and a rambunctious border collie. She blogs about her family's homestead life at The Happy Hive.


