This post may contain affiliate links.
Sheet mulching is a permaculture practice for creating a garden bed that feeds your plants with nutrients and doesn’t require digging. Instead, a sheet mulch garden bed layers materials over the top of your soil to build a garden, beginning and ending with weed-discouraging ground cover. This article will teach you how to build a sheet mulch garden from scratch using materials sourced from your own property as much as possible.
Why build a sheet mulch garden?
Sheet mulching cuts down on manual labor, avoids the need for a rototiller, and decreases ongoing maintenance needs. It also works with mother nature by piling up useful materials rather than overworking the soil (which can happen with repeated tilling).
Sheet mulch gardening can improve nutrient levels of things like nitrogen in your garden, so that you are starting out with just what you need for your plants.
Best of all, sheet mulch gardening is less expensive because you can often use materials that you source from your own home!
We have tried the sheet mulch method in different variations over the years. It is sometimes referred to it as lasagna gardening. Our most recent resource for creating vegetable beds using the sheet mulch method came from Gaia’s Garden, an invaluable book on integrating permaculture practices into your homestead by Toby Hemenway.
After learning the basics of sheet mulch gardening from Gaia’s Garden and a few other permaculture websites, we designed our own sheet mulch beds using a variation on Toby Hemenway’s method. Because we wanted to maintain rows in our garden, we decided to use sheet mulch individual rows rather than for our entire garden. But, you can certainly use this method to clear out an entire garden space.
Prepare your Garden Space for Sheet Mulching
Before building our sheet mulch rows, we weed-whacked the garden, leaving the weeds in place after cutting. Then we made sure the garden was wet (we happened to get a nice rainy day, but if your ground is not moist naturally you’ll want to wet it down before starting).
Collect your Sheet Mulching Materials
Sheet mulching layers can vary based on what you have on hand or easily accessible, as well as how many layers you want to use. You’ll need to at least block the grass from beneath, nourish with nutrients, and provide a planting medium or soil.
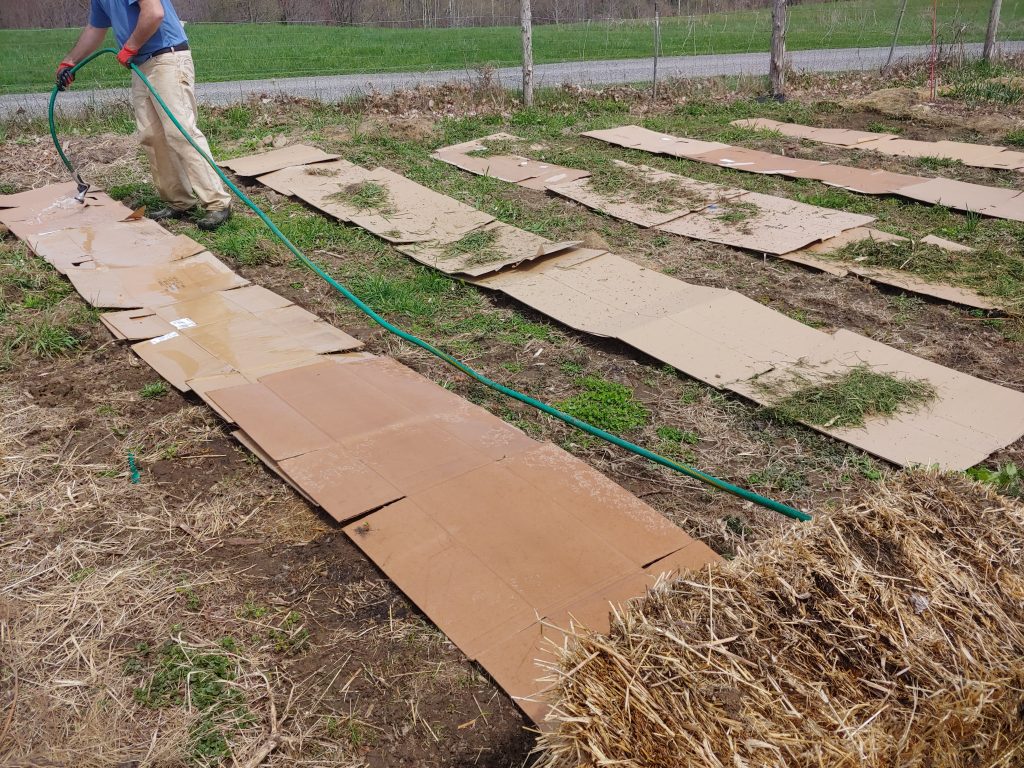
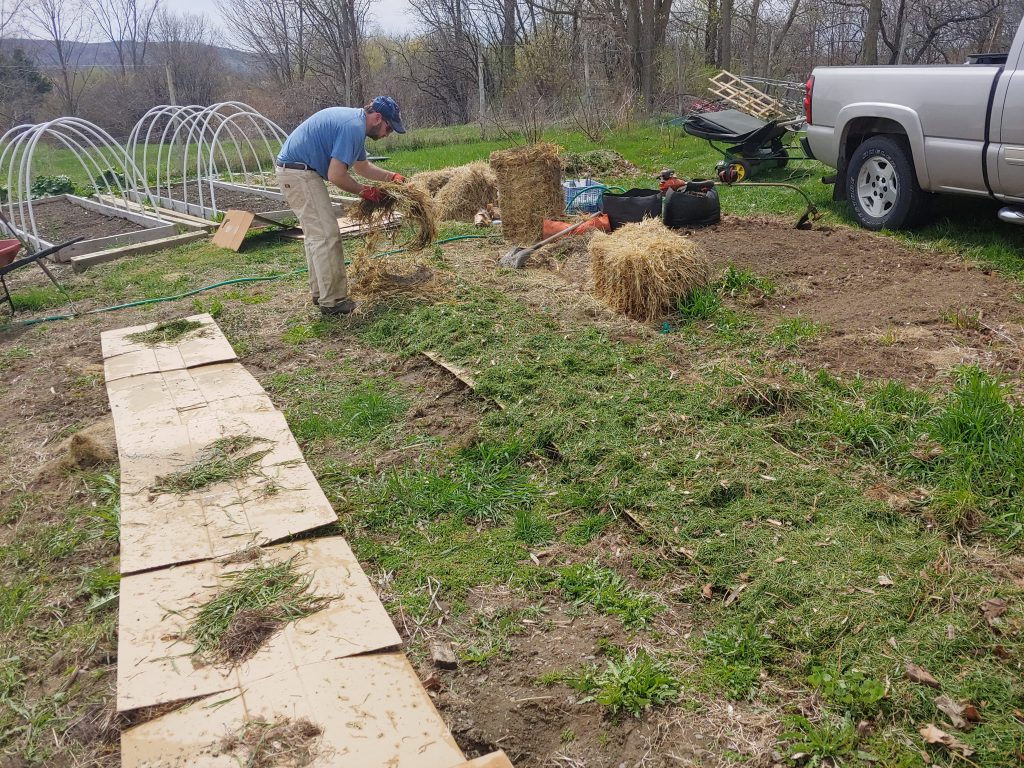
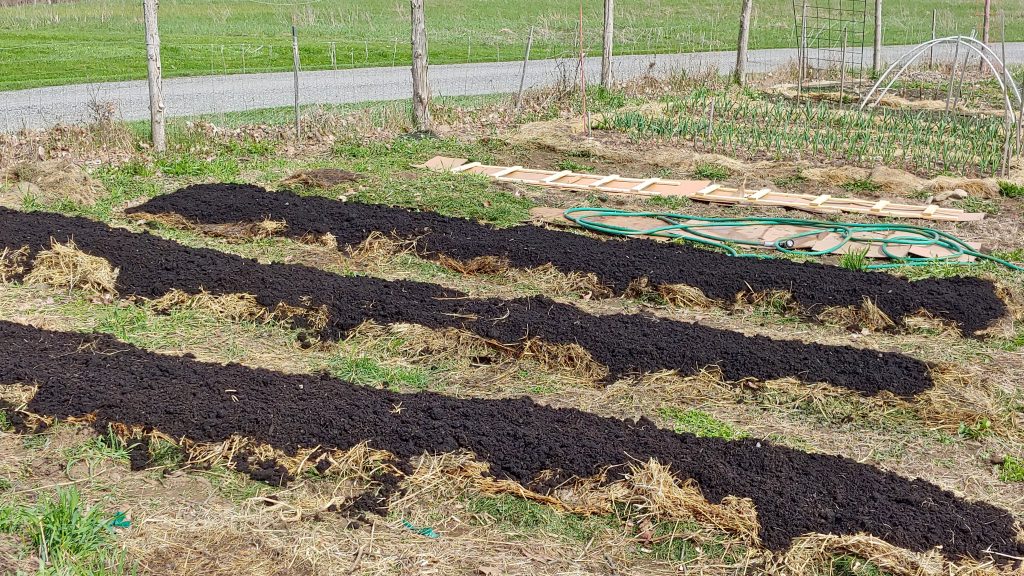
Our sheet-mulched rows included the following layers:
- Cardboard Boxes, rescued from the recycling bins at a clothing store. We opened up the boxes, removed tape, spread them out flat, and drenched them with a garden hose. This layer kills the existing weeds (or grass) and keeps more from growing up into our bed over the course of the season. Wetting the cardboard helps it stay in place and ensures a bit of moisture as you are building the rest of the bed. You can also use newspaper, in thick stacks, for this layer.
- Grass Clippings, collected in our John Deere tow-behind lawn sweeper from other areas of our homestead. This layer provides a hearty source of nitrogen for our plant roots to grow down into. (side note: we LOVE our lawn sweeper for collecting grass in the spring. We use for mulching our entire garden bed!)
- Dry Hay, re-used from the hay bales that had provided a safety barrier on our sledding hill during the winter. The hay will break down gradually and form even more compost in your bed. Again, you’ll want to dampen this layer.
- Compost, sourced from our local compost station and supplemented with our own compost produced at home. This layer provides the medium into which we planted our seeds and seedlings. It also provides a healthy mix of all of the other nutrients that help our veggies to grow.
- Lastly, we added a second layer of dry grass clippings used for mulching the vegetables. This layer serves as a top mulch, discouraging weeds from growing around our plants and also adding another shot of nutrients (it also looks nice).
Build your Sheet Mulching Rows
We laid down our sheet mulch in the order shared above (cardboard, grass, hay, compost, grass). Between each layer, we sprayed materials with a hose to ensure the beds were moist and secure.
For compost and grass, aim for about a 2 inch thick layer. For hay, aim for about a 4-5 inch thick layer. Spread evenly, and all layers can be applied on the same day.

Finishing the Sheet Mulched Bed
Between our sheet mulch rows, we weed-whacked anything that was growing, then applied a layer of garden fabric followed by a thick layer of wood chips (sourced from our own woods and chipped by a tree company that was taking down some tall branches). This allows us to maintain our rows year-after-year, rebuilding or supplementing the sheet mulch as needed.
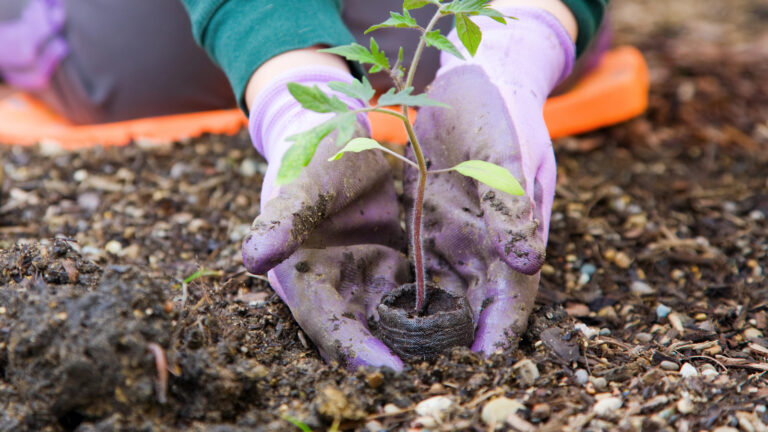
Once your sheet mulched rows are established and have had a week or two to bake in the sun you can plant! Sheet mulched rows work for either seeds or transplanted seedlings. Just dig down into your materials and pop your plant in. The bed will begin to decompose over time, offering valuable nutrients for your plants. Eventually, it will simply look like a bed of extremely healthy soil!
If you added grass clippings on top for mulch, you can simply push them aside when planting. This is also a great time to add another layer of grass mulch. If using grass clippings on top, add grass in about two-inch thickness (applied more than once) so that the grass can dry out in the sun.

You’ll notice that most of the materials we used for our sheet mulching beds were either re-used, recycled, or recaptured from our homestead, making this a cost-effective means for building beds. The only things we spent money on were having the wood chipped for our aisles (about $80) and a half-yard of compost (about $35). We expect these beds to last multiple seasons, with perhaps a supplemented layer of compost and some more grass mulch, making them a great return on investment in the long run.
The entire process of sheet mulching was fairly simple. It did not require a ton of physical labor other than shoveling the compost.
Making gardening easier is always a worthy goal!
So far, these beds have performed extremely well in our garden; plants are strong and weeds are minimal. Thus, we highly recommend this method that works with nature (through layers of helpful materials) rather than against her (i.e. tilling and damaging the soil) to enhance your garden success and ease your garden chores!
More Articles on Garden Soil Health
- How to Increase Nitrogen Levels in your Soil: Natural Methods
- How to Test your Garden Soil: A Comprehensive Guide
- How to Use Eggshells in the Garden
- No-Dig Gardening (Book Review)

Carrie Williams Howe is an educational leader by day and an aspiring homesteader by night and weekend. She lives on a small homestead in Vermont with her husband, two children, and a rambunctious border collie. She blogs about her family's homestead life at The Happy Hive.

