This post may contain affiliate links.
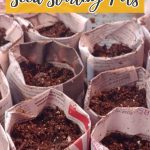

Newspaper seed-starting pots are a simple and environmentally friendly solution for seed starting. Not only are you reusing a free resource to make them, but you can also plant them directly in your garden when you are ready to transplant.
Making newspaper seed starting pots is easy—all you need is a few simple supplies and a quick rolling and folding process.
Here’s how to make and best use them for your seed starting operation.

Supplies:
- One full edition of your favorite free newspaper (one paper will usually be enough for a full tray of pots)
- Scissors
- A pint jar or other round jar
- A seed starting tray or any plastic bin
Step One: Cut the Newspaper into Wide Strips
You’ll want strips of newspaper, cut whichever way is longest, about 2-3 inches wider than the jar you use, laid on its side. Cut the whole paper into strips, then stack those strips on top of each other to make assembly easy!

Step Two: Roll Newspaper Strips around your Jar
Tip: I have found that pots are more sturdy but still fold well with a double-thick layer of newspaper. One layer seems too flimsy, but more than two is hard to fold and keep in place.
Align your jar’s top (open) end to one side of the newspaper strip. Holding the top of the newspaper onto the lid section of the jar to keep it secure, roll your newspaper strips around it until you reach the end. You should have about 2 inches of free rolled newspaper at the bottom.

Step Three: Fold the Newspaper at the Bottom
Holding from the open end of the jar, fold the bottom 2 inches of newspaper around the jar in sections to create multiple folds that will eventually cover the bottom.
Then, using your thumb and forefinger, create a crease around the bottom of the jar to help the folded paper stay in place as the bottom of your pot.
Step Four: Remove the Jar
Holding the newspaper pot lightly toward the bottom, gently shake the jar out of your pot (be sure to catch it carefully!).

Step Five: Fold the Top of your Pot Inward
To help the end of your roll stay put and to make your pot more sturdy, now you’ll fold the top of the pot in all the way around to make a top seam. Aim for about a one-inch fold and squeeze that crease around.

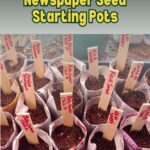
Step Six: Place in your Seed Tray
Place your finished pot in a seed tray. In the beginning, your pot will seem flimsy. Don’t worry! Once you snugly pack them into a tray and fill them with soil, they will squeeze against each other and be much more stable.

The Whole Process takes 30 Seconds!
Seed Starting Tips:
To use these newspaper seed starting pots effectively, remember to use a high quality seed starting mix (we like the seed starting mix from Gardener’s Supply). We blend the seed starting mix with warm water before filling our pots.
We plant our seeds and label them using leftover slices of wood from the workshop (you can also use Popsicle sticks or any other piece of scrap wood you have lying around).
Consider using a seed mat to keep your seeds warm as they germinate, as well as a grow light to help move things along.
Seed Starter And Record Keeper Planner
Want to start seeds indoors but need help staying organized? This simple downloadable seed starting kit includes both a seed starting plan to help you set dates for planting and a seed starting record so you can keep track of the specific fruits and vegetables you’ve planted.

Happy Growing 🙂
Carrie Williams Howe is an educational leader by day and an aspiring homesteader by night and weekend. She lives on a small homestead in Vermont with her husband, two children, and a rambunctious border collie. She blogs about her family's homestead life at The Happy Hive.


