This post may contain affiliate links.
Canning the food you harvest is an excellent way to boost your self-reliance. Canning is one method for preserving food from the garden season to the last year-round. Canned food does not have to be refrigerated or frozen, so it does not require electricity.
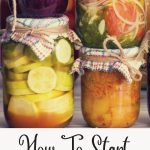
If you are new to canning, this article will help you learn about the methods, resources, and equipment you will need to start canning at home.

Complete Guide to Home Canning – Simplified
Learn essential techniques and tips for preserving fruits, vegetables, and more.
This 34-page eBook is filled with all the essential tips and tricks you need to start canning at home. Whether you’re new to this or looking to refine your skills, our guide makes canning easy and enjoyable.
Canning Methods: Hot Water vs. Pressure Canning
There are actually two types of canning methods for home preserving: hot water bath canning and pressure canning. This article discusses hot water bath canning because it is an easier place to start and requires less equipment than pressure canning.
Hot water bath canning involves placing canning jars in a large pot of hot water and boiling them for a certain amount of time (depending on the recipe). This method creates an airtight seal between the glass canning jar and the rubber-edged lid. It also removes much of the air from the jar, creating a vacuum seal that helps to preserve food.
Hot water bath canning is best for foods that are cooked or pickled. It is also best for fruits and vegetables. With only a few exceptions, canning raw vegetables or meat requires pressure cooking to ensure food does not go bad when stored.
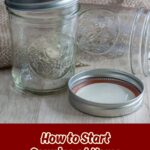
Hot Water Canning Equipment & Supplies
To can food regularly, you will need a few pieces of key equipment. The equipment for hot water canning is inexpensive and readily available. You’ll need a few items on hand for regular canning and the supplies for each recipe you make.
You can often find beginner canning kits that contain much of what you need and are conveniently priced. Or, you can purchase individual canning items, including:
A Canning Pot or Extra-Large Stock Pot
Traditional canning pots have a large capacity, providing space for a whole batch of jars. One of the most common pots used for canning is the Granite Ware Speckled Enamled Stock Pot.
A more sturdy option is a stainless steel multi-use canner like this one from Roots & Branches. Any extra-large stock pot will do, but ensure it will hold at least 15 quarts for best results.
A Pot Rack or Canning Rack
This rack will help keep glass jars off the bottom of your pot to avoid cracking. A traditional canning rack also has handles that attach to the side of your pot so that you can lower the jars into the boiling water and lift them up when you are ready for them to cool. A simple round metal cooling rack that fits just inside your pan will also do in a pinch.
A jar lifter with a secure grip helps you to lift and lower jars.
A jar lifter is especially important when you don’t want to burn your hands with hot water or steam.
A jar lifter looks like a big pair of tongs with a rubber lining that helps to grip the jar safely. Ball canning makes a basic jar lifter that is typically under $5.00 – a great investment for safety.
A canning funnel
This helpful tool has a wide mouth opening that fits inside typical canning jars. Canning funnels are available for less than $10. They help you to add your liquid or cooked product to the canning jar without spilling.
This may seem extravagant, but the funnel will become one of your favorite tools. Since canning jars need to be cleaned to seal properly, the funnel helps avoid spills on the rims. It’s also key to ensuring hot food goes where you want it instead of all over your counter or your hands.

Canning Jars
Once you have the basic equipment you’ll use each time, you also need the supplies for the actual canning—i.e., canning jars. Each recipe you use should indicate what size jars you’ll need and how many the recipe makes.
Canning jars are usually sold in boxes of about a dozen, and come in a variety of sizes from mini 4oz canning jars that are great for gifts or condiments to quart-sized (32oz) canning jars that are great for tomato sauce or apple sauce.
That said, the most common-sized jar is a half-pint, commonly referred to as a “jelly jar” because it’s perfect for jams and jellies.
Canning jars come in “wide mouth” and “regular mouth” sizes. The “mouth” refers to the jar’s diameter or how big the circle is. Jelly jars are regular mouths, whereas an 8oz jar that is shorter and wider would be a wide mouth.
It is really up to you what size you use, but we find that wide-mouth jars work well for spreads you want to access with a knife. In larger sizes, wide-mouth jars can be nice for canning whole tomatoes.
Another great thing about canning jars is that they can be reused! So, if you find a stash of jars at your grandmother’s house that isn’t cracked or chipped, you can clean them up and use them yourself.
Canning jars come with lids and bands that are used when placed in a hot water bath. Canning lids and rings can get easily damaged and aren’t always good to reuse.
While a clean, used lid might work in a pinch (and we have been known to do this), the best practice is to buy new canning lids each time you are canning. Rings are easier to reuse, but make sure they are not dented or rusty.
Canning Recipes
When it comes to canning, recipes matter. It is important to get the right balance of acid in whatever you are canning to preserve it well and prevent it from going bad or growing mold. Especially as a beginner, you can’t fudge a canning recipe. Acid can come from the food itself or from something you add, like lemon juice or citric acid.
Recipes for canned goods abound on the internet and in various books. But if you are a beginner and want a variety of recipes and canning protocols, the best book to own is the Ball Complete Book of Home Preserving. You name a food you want to can, and it is in there.
Recipes in the Ball Complete Book of Home Preserving always include the amount of jars needed and tend to be pretty accurate. Timing is always explained, and every recipe gives the basic nuts and bolts of the process, not taking for granted what you should already know.
This book has been around for years, and there is a reason it is a staple in many homesteaders‘ shelves. Sure, there are new books that offer more variation and unique recipes, but you should own this book before anything else.
Ball also has a website with a lot of useful tips and recipes.
Grab Homemade Labels from the Shop
We’ve curated the perfect labels to help you get organized. Designed to bring simplicity and elegance to your spice collection. These Jar Labels will transform your spice storage and add a touch of minimalist charm to your kitchen.
Once you have the equipment you need, the jars to fill, and the recipe know-how, you are good to go! Canning can be incredibly rewarding as you watch your shelves fill with beautiful homemade items. Canned goods also make great gifts, and you can follow our tips for making your own labels to get really personal with your products!
Don’t forget to grab your ebook.
Carrie Williams Howe is an educational leader by day and an aspiring homesteader by night and weekend. She lives on a small homestead in Vermont with her husband, two children, and a rambunctious border collie. She blogs about her family's homestead life at The Happy Hive.


