This post may contain affiliate links.


This
It can be used on any leather product, including boots, purses, and even baseball
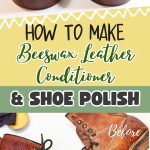
Let’s get into how you can create this shoe polish. We created this polish specifically to refresh and repair an old leather boot.

Boots to Rescue with Polish
I’m happy to rescue these boots, fix them, and find good homes. Yet, I’d also be happy to see people keep their well-loved boots and give them a new life with a nice touch-up!

This
Leather Conditioner Ingredients and Supplies

This recipe for homemade
- 2T Shea butter (conditions the leather)
- 2T Sweet Almond Oil (adds moisture back into dry leather)
- 1/4 cup Mineral Oil (adds shine) or Fractionated
Coconut Oil (if you want to avoid petroleum products) - 1/4 cup Beeswax (protects the leather)
- Measuring cups (liquid and solid);
- A double boiler;
- An old spoon or wooden skewer for stirring
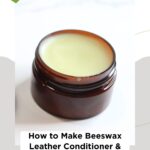
- Containers for your finished product (we recommend these 2 oz screw top tins from Amazon, but you can also refill old shoe polish tins or put the polish in small glass mason jars).
While we made our original conditioner with mineral oil, we switched to fractionated
Both add shine to the polish and retain their qualities over time. Fractionated
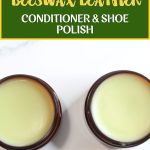
The recipe makes approximately 6 oz. of polish (three 2 oz. tins worth) and can be doubled easily to fill 6 tins.
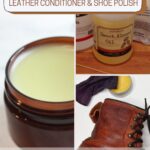
Instructions for Making Beeswax Shoe Polish & Leather Conditioner
The process for making this shoe polish and leather conditioner is actually quite easy.
- Fill the bottom of your double boiler with water and place on the stovetop over medium heat;
- Add shea butter and
beeswax to the top of the double boiler and melt, stirring occasionally. - Once shea butter and
beeswax are fully melted and incorporated, add mineral oil and sweet almond oil; stir to combine and leave over heat until they are well incorporated; - Remove the top pan from your double boiler, dry off any water particles on the bottom, then pour out gently into containers;
- Allow containers to cool fully—at least 5 hours or overnight—in a cool location (basement, unheated garage, etc.).


Place covers on containers and label (check out these instructions for making your own homemade labels!).

How to use Beeswax Shoe Polish & Leather Conditioner
We call this polish and conditioner for a good reason – it does both! The shea butter and sweet almond oil moisturize and condition your leather to nourish it and bring it back to life. The mineral oil adds shine (like a polish). And after all of that great treatment, the
Yes, this polish and conditioner can be used on shoes, but it can also be used on bags and other leather goods. Just be sure to test first before applying to your entire article.

The application is simple:
- Be sure the item you will condition and polish is clean;
- Apply polish in circles, being sure to rub into seams, stitches, and creases well;
- Remove or rub in any excess polish;
- Allow the item to dry completely before using/wearing;
- Repeat every few months or more often with items you use regularly.
What else can you make with Beeswax ?
There are so many wonderful things you can make with
Try some of these products yourself!
- Beeswax Furniture Polish
- Beeswax Leather Conditioner
- Beeswax Pinecone Fire Starters
- Beeswax Lip Balm
- Beeswax Christmas Tree Ornaments
- Beeswax Lotion Bars
How to Make Beeswax Leather Conditioner & Shoe Polish

Equipment
- Measuring cups (liquid and solid)
- A double boiler
- An old spoon or wooden skewer for stirring
- containers
Ingredients
- 2 T Shea butter conditions the leather
- 2 T Sweet Almond Oil adds moisture back into dry leather
- 1/4 cup Mineral Oil adds shine or Fractionated Coconut Oil (if you want to avoid petroleum products)
- 1/4 cup Beeswax protects the leather
Instructions
- Fill the bottom of your double boiler with water and place on the stovetop over medium heat;
- Add shea butter and beeswax to the top of the double boiler and melt, stirring occasionally.
- Once shea butter and beeswax are fully melted and incorporated, add mineral oil and sweet almond oil; stir to combine and leave over heat until they are well incorporated;
- Remove the top pan from your double boiler, dry off any water particles on the bottom, then pour out gently into containers;
- Allow containers to cool fully—at least 5 hours or overnight—in a cool location (basement, unheated garage, etc.).
- Place covers on containers and label (check out these instructions for making your own homemade labels!).
Carrie Williams Howe is an educational leader by day and an aspiring homesteader by night and weekend. She lives on a small homestead in Vermont with her husband, two children, and a rambunctious border collie. She blogs about her family's homestead life at The Happy Hive.


While I realize this may be a stretch, I was wondering if you had the shoe polish recipe in mass/grams instead of a volumetric recipe. This wont stop me from trying to make it or anything. I say this with a touch of sarcasm, but I prefer recipes in grams because I’m “detail oriented,” and not because I made an exorbitant kitchen scale purchase and need to justify the cost through usage.
Anyways, thanks for all the information you share!
Sorry, I don’t currently have it as such 😉 But I hope you’ll try it.
Hi – if you dont have the recipe in weight, can you explain what 2T means in your recipe? I may be missing something here but I cant seem to find it anywhere. I assume it means 2 tablespoons? But would just like conformation. Thanks
Yes, 2 Tablespoons.