This post may contain affiliate links.
Making garlic powder at home is easy and satisfying. Turning your fresh garlic into garlic powder is also an excellent way to preserve garlic.
Homemade garlic powder can be made in just a few simple steps.
Making Garlic Powder the Easy Way
Making homemade garlic powder takes just a few simple steps:
Equipment
- Dehydrator (or other drying method)
- Spice Grinder, Coffee Grinder, or Mortar and Pestle
- Knife
- Cutting Board
Materials
- 4-6 large Garlic Heads, preferably from your garden or a local farm!
Instructions
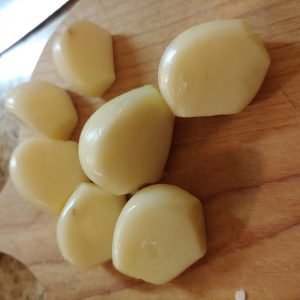
- Separate garlic heads into cloves and peel garlic cloves.
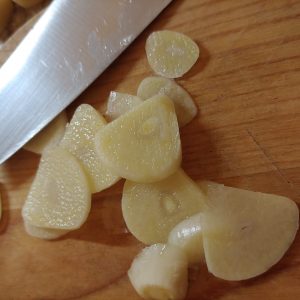
- Slice garlic cloves into thin, uniform slices. Uniform slices will dry at the same rate and help to avoid burning some slices while you wait for others to be ready.
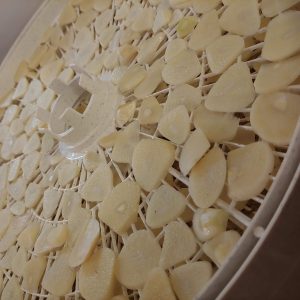
- Lay garlic cloves on your dehydrator trays with room between them for air to flow. Do not overlap.
- Set the dehydrator on a low temperature (95 degrees) and set it in a place where there is good air circulation (a porch with open windows works great)
- Check the garlic after 10-12 hours. The slices should break in half with a crunch instead of bending when fully dried. It may take up to 15 hours to reach this point.
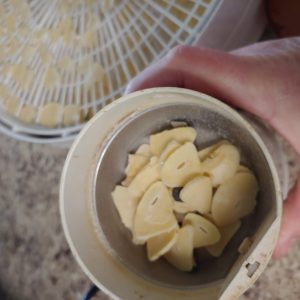
- Once dry, use a spice grinder, coffee grinder (used for spices), mortar, and pestle to grind the garlic in batches.
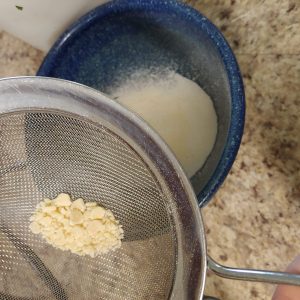
- Sift the ground garlic through a fine-meshed strainer to keep larger chunks out of your garlic powder. This will result in a fine powder. Larger pieces may have a higher moisture content and cause the powder to clump up; set these aside and use them sooner in cooking.
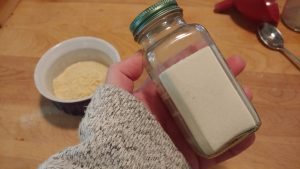
- Place garlic powder into a spice jar or other glass container that seals out air and moisture (or a ziploc bag).
What kind of garlic makes the best Garlic Powder?
Did you know that there are hundreds of varieties of garlic? In addition to the basic two categories of “hardneck vs softneck,” there are fun varieties like Georgia Fire, Okenagen Blue, Music, German White, and so many more.
While you may not taste a huge difference when cooking with these different varieties, some varieties are spicier or sweeter than others. Some even last longer in storage or form larger heads.
Garlic powder can be made with any garlic, but you want to make sure your garlic is FRESH. You can use the grocery store garlic, but you never know how long that garlic has been sitting around or how fresh the flavor will be.
If you haven’t grown your own garlic, find a nearby farmer who has, or ask at your local farm market. You’ll find the freshest garlic in late summer or early fall when the harvest is fairly fresh.
In addition, because you have to slice the garlic cloves, use a variety that forms larger heads like German White or Music. These two varieties are known for good flavor and tend to have large bulbs that are easy to cut and provide a lot of “meat” to work with.
How Much Garlic Powder do you get from one Head of Garlic?
Like many homesteading chores, the answer to this one is “it depends.” It depends on the size of your garlic head and how much powder you will end up with. But you might be surprised how much garlic powder you get from each head of garlic!
I tend to use larger heads of garlic, and I have found that 5-6 heads will fill 3 trays of my dehydrator when sliced and fill a spice jar with garlic powder after all is said and done.
A typical spice jar is about 2 oz, so if it takes about 6 heads to fill a two-ounce jar, I estimate that one large head of garlic makes about 1/4 – 1/3 ounce.
If you want to make enough for gifts or a larger jar, you can use that estimate to calculate how many heads you think you’ll need. But of course, results may vary!

Do you need a dehydrator to dry garlic?
There are a few options for dehydrating your garlic for garlic powder.
Air Drying – Dehydrate garlic in a warm, dry room by slicing it, laying it on a screen, or using a needle and threatening to hang slices to dry.
Air drying can take quite a long time and has unpredictable results. It will work, but watch your garlic carefully.
In your oven – Dehydrate your garlic by slicing and laying it on a sheet pan. This works best on parchment or a cooling rack for air circulation at the lowest possible temperature. With this method, you risk browning or burning the garlic if you aren’t really attentive.
Dehydrator – Dehydrate garlic in a countertop electric dehydrator. With this method, you can control the temperature at a lower setting. You can dry multiple trays at once, and keep an eye on the garlic easily to ensure that it doesn’t brown.
How to Make Garlic Powder
Equipment
- Dehydrator (or other drying method)
- Spice Grinder, Coffee Grinder, or Mortar and Pestle
- Knife
- Cutting Board
Ingredients
- 4-6 large Garlic Heads preferably from your garden or a local farm!
Instructions
- Separate garlic heads into cloves and peel garlic cloves.
- Slice garlic cloves into thin, uniform slices. Uniform slices will dry at the same rate and help to avoid burning some slices while you wait for others to be ready.
- Lay garlic cloves on your dehydrator trays with room between them for air to flow. Do not overlap.
- Set the dehydrator on a low temperature (95 degrees) and set in a place where there is good air circulation (a porch with open windows works great)
- Check the garlic after 10-12 hours. When it is fully dried, the slices should break in half with a crunch instead of bending. It make take up to 15 hours to reach this point.
- Once dry, use a spice grinder, coffee grinder (used for spices) or mortar and pestle to grind the garlic in batches.
- Sift the ground garlic through a fine meshed strainer to keep larger chunks out of your garlic powder. This will result in a fine powder. Larger pieces may have a higher moisture content and cause the powder to clump up; set these aside and use them sooner in cooking.
- Place garlic powder into a spice jar or other glass container that seals out air and moisture (or a ziploc bag).
Carrie Williams Howe is an educational leader by day and an aspiring homesteader by night and weekend. She lives on a small homestead in Vermont with her husband, two children, and a rambunctious border collie. She blogs about her family's homestead life at The Happy Hive.


This is excellent! Thank you for sharing. I can’t believe how easy it is. I’ve wanted to know how to do this for years. Your website is awesome and I’m thrilled to have found it! I’m looking forward to more of your postings!