This post may contain affiliate links.
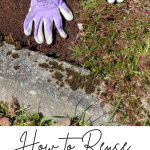

Can you reuse old potting soil from empty planters? The short answer is yes, sometimes. However, you’ll need to follow a few tips to ensure your new plants are happy and healthy.
If you’re anything like us, things tend to get tossed in the shed at the end of the gardening season. When we cleaned our shed last weekend, we found two large grow bags and a half-dozen large pots filled with oil-dried-out soil.
We needed potting soil for our planters and some elderberry transplants, so we wanted to use this old soil.
It seemed a waste to throw it away and spend money on new potting soil. But we also knew that we couldn’t just use the soil as is. We took key steps to restore and replenish the old potting soil, and we were good to go.
How should you use old potting soil?
Certain uses are better for old potting soil than others. For example, we would use old potting soil in large flower boxes that need a lot of soil to fill up and will be planted with hearty transplanted flowers.
We also use old potting soil to boost our compost or add soil to a new bed we create with the sheet mulch method. We regularly reuse the soil in our raised kitchen garden.
We would not, however, use old potting soil for seed starting. Those baby seeds are more susceptible to disease and need the best possible soil to get started.
Because insects or diseases could overwinter in your old potting soil, you’ll also want to make sure you plant something different when you re-use it. You don’t want to give the disease or insect that killed off its previous tenant a new convenient host to feed on.
If you have an appropriate use for your soil and are willing to restore and replenish it through a few steps, you can safely and effectively reuse old potting soil.
How to safely re-use old potting soil
Once you know where to use it, the next step is restoring and replenishing the nutrients in your old potting soil. Here are the 3 steps we use to bring old potting soil back to life for new purposes:
Step 1: “Bake” the Old Soil
The first step if you want to re-use old potting soil is to heat the soil. Baking the old soil in the sun helps to kill off harmful pathogens.
Technically, you can “sanitize” older soil by baking it in your oven for 30 minutes. However, this may not be a feasible option if you don’t want your oven to smell like soil or you simply have too much. Instead, you can bake outdoors on warm, sunny days.
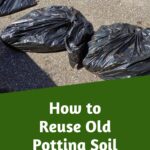
Baking small amounts of potting soil
You can use the trash bag method to “bake” small amounts of potting soil emptied from smaller pots. Empty your old potting soil into large black plastic garbage bags, picking out any big roots or sticks. Fill them just enough to create a 2-3 inch thick “disc” of spread-out soil at the bottom of the bag. Tie off the tops of the bags or twist them and tuck them under.
Place the garbage bags with soil in a sunny spot for about a week. You’ll want about seven days of good warm sun. If it rains, give the soil a little bit longer to bake. When you reach into the bags to feel the soil, it should feel nice and warm.
Baking large amounts of potting soil
If you reuse the soil in a raised bed or huge barrel, you can allow that space to “bake” in the sun before re-planting. However, you may not want to mix the soil up too much because doing so could resurface old pathogens and weeds.
The No-dig gardening method is great for raised beds. When you think the bed or large pot has gotten a significant number of days of spring sunlight, go ahead and move on to the next step – replenishing nutrients.

Step 2: Add Peat Moss to Old Soil
The consistency of old potting soil will probably be pretty dry and crumbly when you run it between your fingers. Your dried-out old soil will probably not hold moisture very well. Peat moss is your solution.
Peat moss is a lighter, drier ingredient in soils that helps lighten the texture and create a more effective moisture balance. It absorbs moisture until your plants need it released. It also helps hold onto nutrients so they don’t get washed out when the plant is watered or rained on.
Add about 1 part peat moss to 3 parts soil. To mix it in, pour the peat moss on your soil and gently fold it in. Peat moss can be very light and blow around, so folding it in helps ensure you don’t lose too much of it. Keep turning the soil until it is well mixed.
*Perlite or Vermiculite could also be added at this stage to create air pockets in the soil and improve its hold on to nutrients.
Step 3: Add Compost to Old Soil
Old potting soil has likely lost many beneficial nutrients, so you must add compost to restore them. Compost offers various nutrients, such as nitrogen, phosphorus, and potassium. It will also help balance the pH of your soil and retain moisture. When you add compost, you’ll notice the improved richness of your soil just by looking at it and touching it!
You’ll want a mixture of about 20% compost or one part compost to 4 parts potting soil. I find that using your hands is the best way to distribute compost throughout the soil. Just dig in there and stir your soil up well!
Now you can use your Potting Soil!
That’s it! Now, you have rich, well-balanced potting soil that is great for planters and grows bags or for mixing into your garden. It can help dampen your soil with water before putting it into your pots to ensure an evenly moist plant start.
I often refill old soil bags with newly upgraded potting soil to keep them on hand for various projects.
Other Topics You Might Like
- How to Improve Heavy Clay Soil in Your Garden
- 10 Ways To Add Nitrogen To Your Soil For A Healthier Garden
- 14 Ways to Dry Out Soggy Soil and Correct Overwatering Mistakes
- How to Test Your Garden Soil
Frequently Asked Questions
Is it safe to use old potting soil?
On the one hand, yes, you can safely use old potting soil with new plants. However, the answer is also “no.” You shouldn’t use old potting soil “as is” without addressing safety and quality issues.
What are the potential dangers in old potting soil?
Old potting soil can contain pathogens or bacteria that will cause new plants to wilt and die. It can also lack the healthy nutrients plants need to succeed.
In addition, old potting soil may contain insect eggs or larvae from harmful insects that damaged previous plants. It can also be full of old weeds that will pop back into life next season.
When should you NOT use old potting soil?
If you know for a fact that a plant that lived in that soil died a horrible death from a pathogen you never want to see again, we highly recommend dumping the soil.
Likewise, if you find a lot of insect larvae or burrowing grubs, it may be time to move on. Throw the unusable potting soil into a compost bin, where it can bake for a year or more, or simply spread it into the woods, where it can decompose in the wild.
When is it OK to use old potting soil?
If you have potting soil from plants that simply finished out a year ago and were done – like herbs or flowers – you can reuse it safely again.
For example, if you have pots on your deck that you replant each year with annual flowers or a raised bed for growing vegetables, this soil should be fine to use again. You’ll just need to take a few steps to ensure success with your re-used potting soil.
Carrie Williams Howe is an educational leader by day and an aspiring homesteader by night and weekend. She lives on a small homestead in Vermont with her husband, two children, and a rambunctious border collie. She blogs about her family's homestead life at The Happy Hive.


Carrie,
This is the article I have needed for many years. No more squashing the old potting soil into garden beds for me. I’m glad to know what to do now.
Thanks!
Susan