This post may contain affiliate links.

Beeswax candles are a natural alternative to paraffin wax candles. Not only are they better for the environment, but they also produce a cleaner and more fragrant flame.
Beeswax is also a superior candle wax because it burns longer and is less likely to create soot than other waxes.
Here’s a quick and easy guide on how to make a

Why Choose Beeswax for Candlemaking?
Beeswax is a natural wax that is produced by bees. It is composed of long-chain fatty acids, giving it unique properties.
Beeswax is a hard wax that melts at a higher temperature than other waxes. This makes it ideal for making candles because it will not melt as easily in hot weather and can be used in various molds.
Beeswax produces less soot than other waxes when burned and lasts quite a long time. In fact, a
Beeswax candles also produce light and a pleasant smell when burned without adding any scents.
Choosing Your Beeswax
When making
For the highest quality option, you can look for
Beeswax comes in bars or pellets. Bars are fine for almost any use but are harder to portion out if you don’t want to use the whole thing. For more flexibility, choose pellets that come in a bag and can be measured by weight.
Supplies for Candlemaking
- Beeswax
- Coconut oil – Coconut oil has a high melting point and is solid at room temperature.
- 4 oz mason Jar Container
- Candle Wicks: Be sure to get wicks that are appropriate for the size of your candle (as measured by candle diameter).
- A double boiler: This is just a pot that fits inside another pot with water in it. The boiling water creates heat that melts the beeswax in the bowl above. You can also use a heat-safe bowl over a double boiler or a specially designed candle pouring pot.
- A glass measuring cup with a spout can be useful for pouring the wax instead of pouring directly from your double boiler.
- Candle Wick Tabs (optional if your wicks don’t come with them): These are little metal or plastic disks you can use to attach the wick at the bottom. They help to keep the wick in place as you pour.
- A stirring spoon: You will need this to stir the wax and ensure it is evenly melted. You can also use a wooden stick (like a kabob or chopstick).
- Scissors
- A pencil or chopstick: Hold the wicks in place while you pour.
- A pot holder or oven mitt: You need this to protect your hands from the hot wax.
How to Make Beeswax Candles
- Cut your wicks to the desired length. The wicks should be about two inches taller than your container. If you are using wick tabs, attach them now.
If you’ll be using a glass measuring cup, put some hot water into your glass measuring cup to warm it while your wax is melting. This will ensure that your wax stays melted when transferred for pouring.
- Measure out your wax according to the volume of your candle holder, either using 100% wax or a combination of wax and coconut oil. I usually approximate how much I will need total, then do a 50-50 split of wax and
coconut oil . - Place the wax into the container you will be using to melt. Remember, you can use a heat-proof bowl set over a saucepan, a double boiler, or a candle-pouring pot. Or, you can use your wax melting pot if you have one.
- Melt the beeswax. Once the
beeswax is melted, remove it from the heat, add the coconut oil (if using), and stir to combine. This is also when you can add a few drops of fragrance if you want your candle to have a scent other than natural beeswax.
If using a glass measuring cup, pour the warm water out of your glass measuring cup and dry it, then transfer your melted wax to this container for pouring. Otherwise, pour right from your melting container.

- Pour enough hot wax to cover the bottom of your mold or candle container. Then, place the wick into the container and center the wick tab.
- Use a pencil or chopstick to hold the wick in place while you let it cool for a minute. Then, pour the rest of the hot wax into your container, moving the wick into place as necessary to ensure it stays centered.
You can also hold the wick in place using two kabob sticks or chopsticks held together with an elastic. Stretch the wick gently so that it is straight from bottom to top and centered while the wax cools.

- Allow the candle to cool until completely hardened. For best results, let it sit overnight just to be sure, but it can cool in a few hours. Trim the wick to about 1/4 inch above the top of the wax.
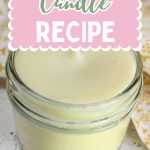
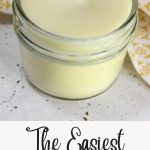
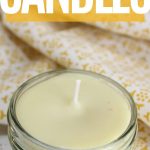
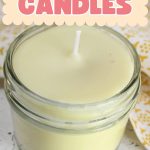
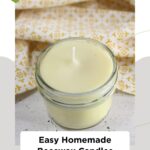
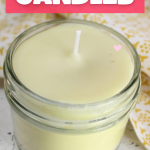
And that’s it! You’ve made your own

What Other Containers Can You Use for Candlemaking?
There are many options for containers for
- Use recycled old jars or tins that you find at garage sales or thrift stores. Thrift stores often have vintage teacups that can also be used to pour your
beeswax candles. They also make an awesome and unique gift. - If you want to make a bunch of uniform candles, you can use mason jars or metal candle tins purchased online or from container suppliers. When choosing tins, be sure to check that they are appropriate for use in candlemaking.
- Skip the container altogether and make candles in molds. Molds are available in sizes ranging from votive candle molds to large pillar candles and all sorts of unique shapes.

How to Store Beeswax Candles
Beeswax candles should be stored in a cool, dry place. If mixed with other ingredients, they will melt more easily, much like any candle in a hot climate. Store out of the sunlight and preferably in a colder part of your house when not in use.
You can also wrap
Be sure to allow your candle to fully cool down and become solid again before storing or covering.
Tips When Mixing Beeswax with Other Ingredients
Beeswax is a very hard substance with a high melting point. Pure
You can actually play with the ratio of
A 50-50 ratio of
What else can you make with beeswax ?
There are so many wonderful things you can make with beeswax. Personal care products take advantage of the health benefits of
Try some of these products yourself!
- Beeswax Furniture Polish
- Beeswax Leather Conditioner
- Beeswax Pinecone Fire Starters
- Beeswax Lip Balm
- Beeswax Christmas Tree Ornaments
- Beeswax Lotion Bars
Carrie Williams Howe is an educational leader by day and an aspiring homesteader by night and weekend. She lives on a small homestead in Vermont with her husband, two children, and a rambunctious border collie. She blogs about her family's homestead life at The Happy Hive.


