This post may contain affiliate links.


A top-down fire is a great strategy for building a fire in a wood stove, fireplace, outdoor oven, or campfire.
The process is just like it sounds – you build a fire with the largest pieces on the bottom and the kindling on top instead of the other way around. You light the top of the fire, and it slowly and efficiently burns down through all of the layers underneath.
Building a top-down fire is one of many strategies that we use to burn wood efficiently and effectively in our homes.
Here’s a quick guide on how to build your own top-down fire.
Why build a top-down fire?
There are plenty of reasons why we should build a top-down fire. Here are just some of the reasons and benefits:
Top-down fires start more successfully.
If you have ever found yourself in a position where you are getting the fire going only to find that minutes later it is dead? If so, you’re going to love this method.
Why? As the top layer of kindling catches and burns, it settles down into the wood below it. The fire then follows suit, keeping itself going with little effort.
Top-down fires are less likely to collapse into themselves.
One of the reasons that top down fires burn more successfully is that they are not prone to falling in on themselves.
A fire with smaller pieces on the bottom will burn those smaller pieces first, and larger pieces will fall in on them. This will potentially put them out or halt the progress of the fire.
This is also great from a safety perspective because a sudden collapse of a fire can lead to flying sparks – which can be dangerous to the people and environment around the fire.
Top-down fires result in less smoke.
One of the functions of the flue in your fireplace or wood stove is to suck smoke up the chimney and out of your house. This happens faster when the flue is hot.
By lighting a top down fire, you put the hottest flames at the top, closest to the flue. As a result, your flue will heat up faster and, therefore, pull more of the smoke from your fire right from the start.
Top-down fires last longer.
When you build a top-down fire, you build up a significant pile of logs that will burn for a long time without adding more logs. In the case of a wood stove, a top-down fire could burn for hours without having to revisit it at all.
How to Build a Top-Down Fire
While building a top-down fire is pretty straightforward, there are a few tips that can help lead to success on the first try.

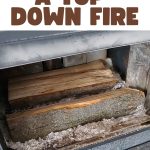
- Lay down your largest pieces of wood close together as the bottom layer.
The first layer of logs is your thick, wide logs that usually take a little while to get started and will burn for a long time.
You don’t need a ton of space between them because as the fire burns down and catches, it will have plenty of airflow above it. Putting them close together leads to an even longer burning fire.

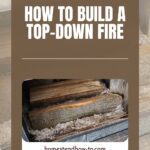
- Build your second and third layers with progressively smaller logs, placed close together.
Depending on the size of your wood stove or how big you are building an outdoor fire, you can add 2 or 3 more layers before moving onto the kindling.
Cross-cross these in opposite directions from the layer beneath, placing them close together and building as solid a block as you can.

- Finish by putting small kindling and newspaper or a piece of fatwood on top
The last two layers of your top-down fire are small pieces of kindling and whatever you will use as your fire starter. Your fire starter can be twisted pieces of newspaper or an alternative fire starter – like a piece of fatwood.
You can also use a pine cone fire starter – these are easy to make at home and take advantage of the safe burning qualities of

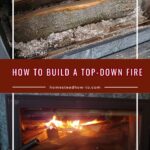
- Light your Fire and Enjoy!
Once you have built your fire, all you need to do now is light your newspaper or fire starter with a match or lighter (or a spark if you’re a skilled outdoors person!).
Watch the top-down fire work its magic as the fire starter settles down into the kindling, and the process of getting the whole fire going begins! If you’ve built your top-down fire well, you should still enjoy its heat up to four hours later.

The Downside to Top Down Fire
The one downside to the top-down fire is that it can take longer to heat a wood stove. The fire tends to move slowly down into the larger logs, and thus, the fire burns low and slow.
It still heats the wood stove but if you’re in a rush for high heat, you might want to build a typical fire and let it burn hot and fast, and then add more wood.
You can read more about heating with a wood stove and saving money on firewood elsewhere on our site to round out your wood heating strategies!
Carrie Williams Howe is an educational leader by day and an aspiring homesteader by night and weekend. She lives on a small homestead in Vermont with her husband, two children, and a rambunctious border collie. She blogs about her family's homestead life at The Happy Hive.


