This post may contain affiliate links.
Making your own
Over a few years of experimentation with backyard sugaring methods, we’ve learned a few important tips that have helped us to hone in on a process that works more efficiently. Boiling sap more efficiently helps us make more syrup than we would have otherwise produced, faster, which is the whole goal!
Part of our learning curve was deciding what equipment to use, and we have to admit that going from a homemade piecemeal solution to a product produced especially for efficient backyard boiling was a huge part of increasing our yield. But the general concepts we learned as we moved to this equipment can be applied to any backyard setup.

your heat source running consistently hot.
Efficiency Tip #1: Keep your heat source steady and consistently hot when Boiling Maple Sap
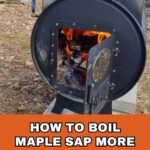
If you want your maple sap to boil down faster, you’ll need your sap to stay at a boil as much as possible. The first time I used our backyard evaporator, I was worried that the fire wouldn’t die down when I was done.
I quickly learned that the fire actually dies down faster than you would expect. Keeping it nice and hot the whole time you want to boil is the way to go. Otherwise, your sap doesn’t work up a good boil and evaporates MUCH slower.
Burning your fire in a drum or otherwise enclosed system can help to keep your fire hot. A fire burning out in the open air is impacted by the wind, and not all of the heat ends up on your pan. This is one of the primary reasons we like our Sapling Evaporator from Vermont Evaporator Company.
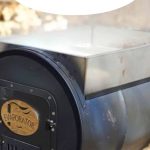
The Sapling is a manufactured version of the traditional “55-gallon drum” design, but the careful design and assembly are tighter and more efficient because the pan fits perfectly into the opening. The barrel has a door to keep it sealed, with vents to maintain oxygen flow. Think of it as the difference between producing heat with a fireplace and a wood stove.

our Sapling Evaporator heat more efficiently.
Our Sapling also has an “efficiency package,” and the components of this package illustrate a few other practices that maintain steady, high heat. It comes with fire bricks to line the barrel and retain heat; a custom fit steel fire grate that holds the logs up inside so that air can flow under them as well as around them (more air = more fire); and an efficiency baffle that sits above the fire and just below the sap pan. The efficiency baffle forces the heat to run over the bottom of the pan twice before it leaves the evaporator.
All of these improvements help to keep sap at a more steady boil, which leads to more consistent evaporation and, therefore, a shortened path to syrup. But remember that you – the human – must make the most of these by building a good fire and keeping it tended!

while the sap that has already been boiling gets concentrated at the other end.
Efficiency Tip #2 Choose the Right Boiling Vessel
Use a pan with a large surface area (consider a continuous flow pan). The key to faster evaporation is creating as much surface area as possible without risking too shallow a depth for the sap.
A hotel or roasting pan is a great solution for a small backyard sugaring operation. Just make sure you start with at least 2 inches of sap because you’ll need to boil down for quite a while. Once the sap starts to get so low that you risk burning, remove it from that pan and bring it inside to finish on the stovetop.
A continuous flow pan (such as the one that comes with the Sapling) is divided into sections, usually as a spout at one end. The idea with this kind of pan is that you always load new sap from one end.
The newer sap pushes the already boiled (or in the process) sap through the baffles in the pan, and the thicker stuff makes its way to the end with the spout. Adding more sap to the pan as you boil is a great option. Sometimes, this type of pan will come with your evaporator, or you can purchase a smaller version with any backyard setup.
Efficiency Tip #3: Consider an at-home Reverse Osmosis System
A reserve osmosis setup removes a significant portion of the water from your sap before you even put it in the evaporator. Sap starts at about 3% sugar; a reverse osmosis system can sometimes get your sap up to 6-8%. Others have described removing 10 gallons of clear water from a 30-gallon tank, meaning you have 1/3 less water to evaporate in your evaporator.
Even with all of these efficiency measures, boiling
Standing by that warm evaporator smelling the scent of maple is worth it every time.
Other articles you might like:
- Article #1: How to Tap a Maple Tree for Syrup
- Article #2: How to Collect & Store Sap for Maple Syrup
- Article #3: How to Boil Sap for Maple Syrup
Carrie Williams Howe is an educational leader by day and an aspiring homesteader by night and weekend. She lives on a small homestead in Vermont with her husband, two children, and a rambunctious border collie. She blogs about her family's homestead life at The Happy Hive.


Great insight here… I’m a huge fan an anything and everything that helps folks realize they CAN make their own syrup. Because it’s the best sugar option on the planet! Thanks for referring folks over to SoulyRested.com… that RO system has saved us so much time and money I hope lots more folks give it a try!