This post may contain affiliate links.


Sprouts are seeds that have germinated and become young plants. They can be easily grown in batches at home with just a

Why Grow Sprouts?
Like salad greens, sprouts can be grown virtually any time of year. This makes them a great solution for folks who want to be more self-reliant and provide more of their own food.
Sprouts are ready to eat very quickly. You can grow them and use them in five days or less!
Sprouts are also high in various healthy nutrients and offer an easier-to-digest protein source. They are also a great source of antioxidants. Studies have shown that they can help control blood sugar, improve digestion, and contribute to heart health.
Most importantly, sprouts are a delicious addition to salads, stir-fries, sandwiches, and other dishes. They are fresh and crunchy and visually appealing as well!
How to Grow Sprouts
Growing sprouts is easy! It takes 3-5 days to get sprouts the size and texture you love, and you’ll need to check on them daily.
- Add 2-3 Tablespoons of Seeds to your sprouting jar or container.
- Fill the jar just over halfway with cold water and allow your seeds to soak for 8 hours.

- Drain the water out of the jar through the top mesh.
- Place your jar face down in a bowl so water can continue to drain, and cover it with a towel to protect it from light.
- Rinse your seeds by filling the jar with water and draining again about every 8 hours (morning and night are okay), placing them back into the bowl upside-down with the towel daily.
- After about 3-5 days, your sprouts should be about 2 inches long and ready to eat! Give them one final rinse and then serve over salad, on a sandwich, or stir-fry.
- Store unused sprouts in the refrigerator for 3-5 additional days (see safety notes below).
How to Choose Your Seeds
A wide variety of seeds, including beans and
You can purchase a seed mix specifically designed for growing sprouts or make your own mix of seeds from what you have on hand. Make sure your seeds are relatively fresh and have not gotten damp.
Don’t be afraid to grow a few sprouts at once, perhaps placing a different seed variety in each jar to see how they look and grow differently. If you use a seed mix, you can start a second jar three days after your first and get a rotation going.
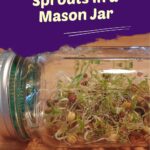
How to Make a Sprouting Jar / Container
To grow your own sprouts (or sprout your own seeds), you’ll need a sprouting container. A sprouting container allows you to soak the seeds and drain the water out after soaking.
Using a quart-sized
You can also purchase pre-fabricated sprouting lids for

Safety Notes on Sprouts
Sprouts have been linked to food poisoning. This is because they are grown in damp conditions where bacteria can also thrive. Follow a few simple best practices to ensure safety:
- Be sure your sprouting jar drains between rinses. This is why you store the jar upside-down—you don’t want water to gather around your sprouts and sit there. Think of rinsing as watering; you want the water to dry in between or drain.
- Do not eat sprouts that have become slimy or smelly;
- Wash your hands before working with your sprouts or serving them;
- Store grown sprouts in the refrigerator;
- If you are concerned about consuming raw sprouts, you can cook them in a stir-fry, omelet, or soup or add them to veggie burger patties.
Other posts you might like
- How to Dry Fresh Thyme – 5 Methods
- How to Propagate and Grow Rosemary from Cuttings
- How to Regrow Scallions in Water
- Beginner’s Guide to Growing Basil in Your Garden
- How to Grow and Harvest Mint
Carrie Williams Howe is an educational leader by day and an aspiring homesteader by night and weekend. She lives on a small homestead in Vermont with her husband, two children, and a rambunctious border collie. She blogs about her family's homestead life at The Happy Hive.


 7")


