This post may contain affiliate links.


You’ve tapped your trees, and in your sugar woods is a symphony of plink, plank, plunk as the maple sap drips into your buckets. You have been collecting and storing sap for a few days, and the weekend or odd day off from work approaches. It is time to boil!
The sap you have collected is a weak sugar solution with a unique mix of minerals. If you haven’t already done so, give it a taste! Making
Maple syrup sold commercially is of a precise sugar concentration.
Fortunately, those who make syrup for subsistence and gifting don’t have to worry about that level of precision. At its most basic level, all you need to reduce sap to syrup is a cooking vessel, a heat source, and patience. It takes 40 gallons of sap from a sugar maple to make a gallon of maple syrup. It can take as much as 60 or 80 gallons of sap from a red, silver or other maple to make a gallon of syrup! Making syrup is not hard, but it does take time.
Step 1: Choose a Heat Source
There are now commercially available hobby evaporators available for the backyard sugar maker; these units come with instructions and are a great choice for beginners.
You may also find homemade units online; these may work just fine but do not typically come with directions. If you aren’t interested in investing in specialized equipment, that’s ok! Many of us start putting together heat-source-cooking-vessel combinations from things we already own. Options abound! But here’s some guidance.

commercially available backyard evaporating option.
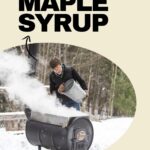
First, we suggest you steer clear of your indoor ideas (pasta pot on stovetop or kettle on parlor stove) because of the mess it makes in your living space (sticky cabinets and peeling wallpaper). Outdoor cooking methods avoid this problem; they include trays, pots, and pans on wood fires and over propane-powered flames.
There are several things to consider when choosing your heat source. Wood is a great fuel for sugaring because it can make a very hot fire at a low cost; you can sugar with wood of a different quality than what you would bring to your house.
It can be messy, though, and unless you enclose the fire and direct the smoke away from your boil, your syrup may have a smokey taste. That doesn’t bother everyone, but there are many common options for those looking to avoid it, including lopping the top off an old woodstove or converting an oil tank, barrel, or even a file cabinet (!) into an enclosed firebox. For folks less . . . metallurgical . . . you can assemble cinderblocks or bricks and stovepipe into enclosed, outdoor fireplaces.
Propane is a convenient but slower and more expensive heat source. If you are using propane, opt for high-BTU burners like turkey fryers rather than using your propane grill, and be sure to protect your flame from the wind by situating yourself in a windbreak or “bricking in” your flame as you would a wood fire.
Step 2: Choose a Boiling Vessel
Now for the vessel. If you have purchased a special sugaring pan, it should come with instructions. These pans are handy because they are engineered for efficiency. Backyard sugaring is never fast, but it does get faster than . . . slow. If you haven’t purchased such a pan, when choosing a cooking vessel from your collection, remember that the more surface area you have, the faster your boil will go.

So, tall and thin brew pots are not as good a choice as the broiling pan for your Thanksgiving turkey, for example. Many first-timers invest in one or more stainless steel buffet pans to maximize surface area while minimizing expense.
Step 3: Start Boiling
Now that you have a heat source and a cooking vessel, you can sugar! To start, situate your pan over your heat source, put some sap in it, light your fire, and bring your sap to a boil. Next, keep boiling! As you go, you will notice that the sap level will drop, the sap will become darker and darker in color, and it will taste sweeter and sweeter.
Depending on the volume of sap you have collected compared to the capacity of your chosen vessel, you may put all your sap in the vessel at once and boil it all down to syrup in one go.
You may put some of your sap in the vessel and add more sap to your boil throughout the day, or you may run two or more vessels at once, boiling from raw sap to sweetened sap in one or more vessel(s), and from sweetened sap to syrup in another.

Whatever method you choose, keep boiling until what you have acts, tastes, and looks like syrup. You can be as precise as you wish: undercooked syrup is yummy but does not have as long of a shelf life; overcooked syrup is sugar (warning: accidental maple sugar can also involve burnt pans, large messes, and gnashing of teeth.)
Put a few drizzles on a cold plate for a simple test and see how it acts. For more precision, take a temperature reading: syrup boils about 7 degrees above water, so a boiling solution measuring about 219 degrees is syrup.
(You can achieve professional precision by taking a brix reading with a syrup hydrometer; they are nifty but not always cheap.)
Most of us who make
This is because those methods allow us to control the heat better (wood heat is hard to regulate) and better monitor the temperature (high-quality thermometers need several inches of fluid to give a reliable reading) to ensure we do not overcook.
And that’s all there is to it! For more advanced tips, check out our article on boiling sap more efficiently, and stay tuned for the final chapter on filtering and canning your syrup. Until then, happy sugaring!
This article is a part of the series on backyard sugaring in partnership with the Vermont Evaporator Company. We appreciate their partnership in helping us test the process and share it with our readers!


