This post may contain affiliate links.

This article is sponsored by MUNBYN, who provided us with a sample label maker and label refills so we could test out their tool for this purpose.
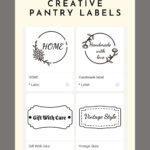
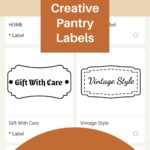
Making labels for your pantry is essential, especially if you buy in bulk or store homemade items. This article discusses why labeling your pantry items is important, what you can include on pantry labels, and helpful tools to make the process easy and fun. DIY pantry labels are both fun and practical!
Why Label Items in your Pantry?
Having a pantry full of food staples can be an important strategy in achieving self-reliance (click here to read our tips on what to store).
You’ll have what you need when you need it without having to go to the grocery store or rely on outside resources for your food. You’ll also save money by buying in bulk or stocking up on things when they are on sale.
But, if you’re going to stock up and store, you need to make sure to carefully label things so you’ll know:
- What is in each container;
- When it was stored,
- and whether it has an expiration date.
Knowing this information about your food will keep you and your family safe. It will also help you to choose what to use first and see what you need to re-stock. You can even go as far as keeping your containers on the shelf in order by date!
Why create your own pantry labels?
While buying pre-made pantry labels or writing on your jars with marker or chalk is possible, making your own custom labels can benefit long-term storage.
Rather than relying on what comes in a package (and likely only using some of the labels), you can create just what you need and only what you need with diy pantry labels. In addition, a printed label from a label or sticker-maker will last longer and won’t rub off like marker or chalk will over time.
If you have a need for a lot of labels, you may also save money by making your own. A label printer can last for years and make thousands of labels, especially if you choose a thermal label printer that doesn’t require ink, like the Munbyn thermal label printer that we tested for this article (we love that we don’t need to buy cartridges that come in more plastic packaging!).
Supplies for printing labels
Choosing a label printer
While there are a lot of label printers out there on the market, we looked for a couple of particular benefits when choosing one to sample. First, we wanted to make sure it was reasonably priced.
We couldn’t rationalize spending $500 on a label printer that wasn’t for an income-generating business purpose. The Munbyn P130 came in at under $100 on sale, which met our requirement for return on investment (though we were provided with a sample as compensation for writing this article).
If we even made just 100 labels with it, they would cost under $1 each, which is much cheaper than buying a bunch of custom or standard labels that might or might not work for what we needed. You can also get 3000 label stickers for under $50 (which should last us quite a while!).

We also wanted to ensure the printer was easy to use and didn’t require design skills to create a label. The Munbyn app made this an easy choice. With tons of customizable labels you can build right on your phone and an easy-to-set-up Bluetooth connection (though a wired connection is also an option), getting from box to label was incredibly fast.
Printing is fast, too – up to 72 labels/minute, which comes in handy if you print labels for a bunch of homemade gifts or a product you sell.
Choosing labels
When choosing labels for our pantry items, we lean toward simple. Sure, you can get labels with designs and pre-printed wording, but it is much harder to fit your information on the label. We like blank, simple labels, often in white. That said, color coding types of food in your pantry can be done if you choose a few different colors for your labels.
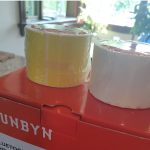
Be careful to choose labels that will last and will stand up to what you are storing. We like that the labels that Munbyn uses are BPA-free, waterproof, and oil-proof. This means we could label jars of sauce, infused oils, and other things that might get messy and not worry that the label would get smudged and illegible.

Step-by-Step Process for Making Pantry Labels (using the Munbyn P130B)
Here, we describe the steps necessary to learn how to make pantry labels using a Munbyn Bluetooth Thermal Label Printer with a cell phone Bluetooth connection, which we tested for this article.
- Open the label printer and plug it into any outlet;
- Scan the QR code on the inside cover of the box to download the Munbyn Print app to your phone;
- Connect your phone to your Munbyn printer with your Bluetooth connection;
- Open the Munbyn Print app and choose a Template;
- Customize the template with your own words, designs, and layout by clicking on items in the template to move them around (you can also create your own by selecting your label type);
- Feed at least 4 labels into the printer, then press the feeder button until it beeps and automatically detects your label size;
- Tap “preview and print”;
- Choose the number of labels you’d like to print and tap “print.”
That’s it! That’s all it takes to start making diy pantry labels with this particular label printer.
You can find more helpful information on creating labels at the Munbyn Help Center, including instructions on how to make labels from your computer using Microsoft Word.


Carrie Williams Howe is an educational leader by day and an aspiring homesteader by night and weekend. She lives on a small homestead in Vermont with her husband, two children, and a rambunctious border collie. She blogs about her family's homestead life at The Happy Hive.


