This post may contain affiliate links.

I love infusing
Pine needles are rich in vitamin C, making them a powerful addition to any natural wellness routine. You can brew them into tea by steeping the needles, or you can make a syrup like we’re doing here. I prefer the syrup because it’s more concentrated and combines the benefits of pine with raw
If you have a pine tree right in my backyard, it’s easy to snip a few fresh branches to make this recipe. But if you don’t have access to your own, the good news is you can also buy pine needles online.
Here’s a simple step-by-step guide to making your own pine needle syrup at home.

Ingredients
- 1 cup fresh pine needles
- 1 ¼ cup water
- 1/2 cup honey

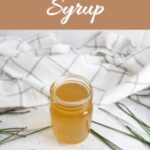
This makes around 14 to 16 ounces
How to Make Pine Needle Syrup
- Add boiling water and pine needles to a jar. Allow it to sit for 45 minutes to an hour. This will allow the pine needles to really soak.

- Then, strain the water out of the jar.

- Next, add the
honey and stir until it’s fully dissolved. If the water has cooled too much and thehoney isn’t mixing well, gently reheat it until everything blends smoothly.


How to Use Pine Syrup
When I feel a scratchy throat coming on or just want an immune boost, I take about one tablespoon of pine syrup for myself. For my kids (ages three and up), I give them around one teaspoon as needed.
I usually take it straight off the spoon, but you can also stir it into warm tea or water. It’s a soothing, earthy syrup that’s gentle enough for daily use during cold and flu season.

How to Store Pine Syrup
If I use about ½ cup of
If I know I won’t use it all within that time, I pour any extra into a freezer-safe container and freeze it. It holds up really well in the freezer and can last for several months that way. When I’m ready to use it again, I just thaw it in the fridge overnight.
Homemade Pine Needle Syrup

Ingredients
- 1 cup fresh pine needles
- 1 ¼ cup water
- 1/2 cup honey
Instructions
- Add boiling water and pine needles to a jar. Allow it to sit for 45 minutes to an hour. This will allow the pine needles to really soak.
- Then, strain the water out of the jar.
- Next, add the honey and stir until it’s fully dissolved. If the water has cooled too much and the honey isn’t mixing well, gently reheat it until everything blends smoothly.


