This post may contain affiliate links.

Fermenting chicken feed wasn’t something I initially planned on doing, but with 32 hungry chickens devouring a 40-lb bag of feed every 4-5 days, it became a cost-saving necessity.
Fermenting chicken feed stretches your feed supply, and offers added nutritional benefits for your flock. Fermentation enhances the feed’s digestibility, meaning your chickens absorb more nutrients from less food, leading to healthier birds and fewer wasted resources.
It’s a simple process that can help cut down on feed costs while promoting the overall well-being of your chickens. If you’re looking for a way to improve your flock’s diet and save money, fermenting your own feed is worth considering.

Why Ferment Chicken Feed
I was mainly interested in fermenting my chicken’s feed to stretch that 40-lb bag longer than 4-5 days. The basic concept is to cover grains in water and allow them to soak for a few days.
As I began researching the process, I realized how beneficial fermentation was to the chicken’s health. Two really interesting facts that support fermentation stood out to me. I did not know grains and seeds contain barriers that protect them before germination.
When ingested, these barriers prevent the absorption of all the nutrients that could benefit the consumer. Fermenting allows those barriers to break down and the nutrients to be accessible. You can read all of the fun, technical information about this here.
Secondly, fermented feed contains more probiotics, vitamins, and good bacteria than regular feed. It is identical to the benefits of fermented foods and yogurts with live cultures. Not only do you save money, but you are actually able to benefit your animals nutritionally.
Fermenting Chicken Feed – Step by Step
Step One
Begin with a clean, food-grade vessel. Since I have 32 chicken mouths to feed, I used a 5-gallon bucket. However, you can avoid using a smaller container if your flock is smaller. Scrub the container clean before you use it.

Step Two
Measure out the feed. Use 1/4 cup per bird. Put the feed in the container. You can add other things (scratch grains, whole oats, oregano, etc.). I recommend getting the basic process down before adding other ingredients.

Step Three
Add in unchlorinated water. If your water happens to be chlorinated, fill a container and let it sit for 24 hours. The chlorine will have evaporated by then. The feed needs to be covered by AT LEAST one inch of water.
It is important to check it frequently during the first couple of hours. As the feed absorbs water, the water level will decrease. Not having the food covered inhibits fermentation and encourages mold and bad bacteria to flourish.

Step Four
The container needs to be covered but still allowed to breathe. If you are using a small container, a piece of cheesecloth is suitable. Make sure to snap some of it on and leave the rest open so the food can “breathe.”

Step Five
Over the next 48 hours, stir the mixture AT LEAST once a day. There should be bubbles when you stir, indicating that fermentation is happening! Monitor the water level and adjust if necessary.
The mixture will take on a slightly tangy smell, which is what you want. It smells similar to some sourdough bread starters I have made in the past.


Step Six
After 48 hours of soaking, the fermented feed is ready for your chickens. I have tried several different ways of scooping it out—using a ladle, a deep fryer skimmer, and a slotted spoon.
I finally used my grain scoop and loved it! Be sure to get down to the bottom as the feed settles after you stir it.
Some of the water will rise to the top. Tilt whatever you use to the side and try to drain off as much as possible. You can reuse the water for the next fermentation.

Step Seven
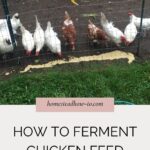
Your chickens are ready to eat! Decide whether to put the food in another container to feed or plop it on the ground. I tried using feed tubs, but the chickens were scared of them!

The fence is wide enough for them to stick their heads through. I push it back and make a feed line on the fence line. I chose not to measure it out for each bird because, well, with 32 birds, that’s a lot of measuring, and I have no way of keeping them all separate.
They do have free choice of feed in their feeders in the coops. They have cut back on eating pellets as much! I have two coops- one with 12 birds and one with 20.
I filled the larger coop once a day and the smaller one every 2-3 days. Since I’ve been offering fermented feed in the morning and evening, I am filling the larger coop every 2(ish) days and the smaller coop every 4-5 days.
Tips When Fermenting Chicken Feed
If you live in a warm climate or have a freakishly hot & humid day, put the fermenting feed somewhere cooler! We had a week of 90+ and humid weather, and I lost two batches of feed to mold. If it ever looks funny or smells off, toss it! It is better to be safe than sorry with animals.
The remaining water in the container can be reused for the next fermenting. Just top off the mixture with new water to ensure it’s covered an inch. It will still contain some great nutrients that will be added to the new batch!
Optional: Two weeks after fermenting chicken feed, I began mixing a regular scratch mix with my feed (cut the feed in half and replace it with scratch). I found the feed easier to scoop by adding the corn and grains. Again, this is a choice TOTALLY up to you!**


