This post may contain affiliate links.


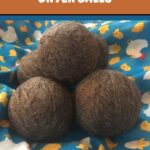

Wool dryer balls are a great DIY project that can be easily made at home and can be done in one afternoon.
When thrown in with clothes, wool dryer balls speed up the drying process while also helping to reduce static and soften clothes. Not only are they better for the environment, they are better for you!
While you can certainly buy dryer balls online, I’m a sucker for a DIY. And they are incredibly easy to make!

Why Make Wool Dryer Balls?
Many of us use dryer sheets to achieve some of these goals, but have you looked at the ingredients on your dryer sheets?


I have been using these store-brand, nature-friendly, minimal-ingredient dryer sheets. I can only pronounce one of them, and it’s “fatty acid.” It’s not exactly something I want to be putting on literally everything I wear.
What You Need
- 100% wool yarn
- a yarn needle or large darning needle
- a pair of pantyhose
- yarn scraps or dental floss

I went to my local craft store and picked up this wool yarn. They usually have a coupon running, and I paid $8.45 for the yarn. I have seen them online for anywhere from $10 to $30! This particular skein has 465 yards. I was able to make five dryer balls with a little left over. I recommend planning for at least 90 yards of yarn per dryer ball.
DIY Wool Dryer Balls
Step 1 – Make Your Yarn Ball
Start by wrapping the yarn around two fingers about 20 times.

Slide the yarn off your fingers and wrap it around the middle 3-4 times.

If you’ve ever made a yarn ball before, that’s how dryer balls begin! If you haven’t, it’s as easy as wrapping the yarn repeatedly around itself until it forms a ball. I made mine the size of tennis balls since the wool naturally shrinks slightly in the dryer. If you want to add essential oils for a scent, add a few drops when you’re halfway through your ball.


Step 2 – Finishing the Yarn Ball
Once you have reached the desired size, cut a tail about eight inches long. Thread the needle through the end. Push the needle through the center of the yarn ball, pulling the tail tightly through. Cut any excess yarn. You have a yarn ball! Repeat for as many balls as you wish to make.


Step 3 – Washing the Yarn Balls
For the balls to become “dryer” balls, the wool needs to be felt. Felting is when wool is washed in hot water and agitated. This forces the fibers to lock together and “felt.” This is key to having your dryer balls not unravel in the dryer.
Grab your pantyhose and cut a leg off. Put the balls into the leg in a single-file row. Use yarn scraps or dental floss to tie off each ball tightly.

Make sure your knots are tight; you don’t want your wool balls to come loose and unravel.
Wash the dryer balls on the hottest setting, preferably with something that will “rough up” the fibers—towels and jeans work great! Then, put them in the dryer for the hottest setting.
Check a ball after the first wash to see if it is felted. Mine took three washes and three dries to get the perfect felt.
How to Use Wool Dryer Balls
Once you’re happy with your dryer balls, please keep them in the dryer only! If you use essential oils and notice the scent wearing off, simply add a drop or two to each ball.
To reduce static in your laundry, wet one of the dryer balls before using it. It magically reduces the static!
How Long Will the Wool Dryer Balls Last?
Dryer balls last for about 1,000 loads of laundry, or 2-5 years.


