This post may contain affiliate links.


Almost everyone knows the classic grape wine, but there’s a whole world of country wines crafted in homestead kitchens for generations that often go unnoticed. These aren’t your typical grape wines; they’re concocted using whatever fruits, flowers, or herbs are on hand – a sort of backyard winemaking if you catch my drift.
This article goes over the basic winemaking process so that you can apply it to any recipe you would like to try. To make a successful country wine, you’ll also need to know a bit about ingredients and equipment to plan for your project.
Choosing Ingredients for Country Wines
Fruit or Flavoring – The sky’s the limit when choosing fruit or flavorings for country wines. Anything growing in the garden will work, but fruits and flowers tend to make the best-tasting country wines. Still, they’re commonly made with vegetables, including parsnips,
Sugar – Though most fruits taste quite sweet, they often don’t contain nearly as much sugar as grapes. To make up for this, white sugar or honey is added. When
You may also find recipes for tannin powder, acid powder, or pectic enzyme. These added ingredients can help improve the wine’s feel or create a clearer finish. Refer to the recipe you are using for best results.
Suggested Country Wine and Mead Recipes
Because every fruit is slightly different, it helps to work from a wine recipe. This is especially helpful when you’re new to winemaking, as it can be hard to judge how much acid, tannin, or sugar is appropriate. Here are a few recipes to get you started:
- ~ Peach wine
- ~ Goldenrod and Ginger Wine
- ~ Rhubarb wine
- ~ Spiced Hawthorn and Rosehip Mead
- ~ Dandelion wine
- ~ Elderberry Mead
Winemaking Equipment
It doesn’t take much equipment to make wine at home successfully. Just like any hobby, winemaking can be done with a lot of expensive equipment if you choose, but there are also alternative methods that don’t entail quite as much investment. To make a one-gallon batch of wine, you’d need the following equipment:
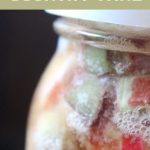
- Fermentation Vessel – Generally, wine is fermented in narrow-neck demijohns, which are by far the most common fermentation vessel. You can also adapt a wide-mouth
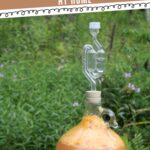
mason jar with a homemason jar fermentation kit (with an airlock). This one-gallon jar fermenter is also a good choice. It can help to have two vessels for when you want to transfer to a clean one part-way through the process. - Air Lock – An air lock allows CO2 from the fermentation process to escape but doesn’t allow oxygen or contaminants to enter the vessel. It fits into the top of the fermentation vessel with a rubber cork, like this water lock and cork combo.
- Sciphon – Moving the wine out of the fermenter is more complicated than just pouring it. The “lees” or sediment at the bottom must be left behind, and the clarified wine above must be siphoned off. The most efficient way to do that is with an auto siphon. This is also handy come bottling time.
- Bottles – Cleaned commercial wine bottles can be used, sanitized and de-labeled. In that case, you’ll need wine corks and a bottle corker. A simpler solution is to use reusable flip-top Grolsch bottles.
- Sanitizer – To avoid contamination, anything that touches your wine should be cleaned with a sanitizer. Like this one-step sanitizer, a simple no, rinse oxygen-based cleaner works well.
While all these supplies can be purchased online, and kits can be very helpful, you may also want to visit your local brewing supply store if you have one. Talking to an expert about the process can boost your confidence!
How to Make A Country Wine
Now that you’ve determined your ingredients and your supplies, you’re ready to start! This basic winemaking process is a great place to start for a beginner.
Once you’ve been making wine for a while, you’ll find that there are many advanced techniques you can incorporate into your brewing.
For now, start with these six steps:
Step One: Juice the Fruit

Prepare the fruit by peeling, coring, and chopping as appropriate. Either use a juicer or press to extract the juice or cover the chopped fruit pieces in sugar and allow the sugar to extract the juice for 4 to 48 hours, depending on the toughness of the fruit.
Occasional stirring helps distribute the sugars and break open the fruit cells.
Step Two: Pitch the Yeast
Strain off the sugared fruit juice and add it to a fermentation vessel with your recipe’s winemaking additives.
Dissolve the dry yeast in ¼ cup of water and allow it to bloom for at least 5 minutes. This gives it time to wake up so the yeast isn’t shocked by high sugar levels.
Add the yeast to the fruit/sugar mixture in the fermentation vessel and fill it near the top with clean, chlorine-free water.
Step Three: Seal the Fermentation Vessel
Leave about 2 inches of headspace in the fermentation vessel and seal it with an airlock. This is important because it prevents a buildup of pressure during the fermentation process while ensuring that no harmful bacteria or vinegar cultures infect a homemade wine.
Step Four: Primary Fermentation
Set your fermentation vessel in a room temperature location out of direct sunlight (unless your recipe calls for something different).
The yeast will get going within 24 to 48 hours, and a fast and somewhat violent fermentation will continue for 2-4 weeks. This is when much of the alcohol is produced.
Check on your wine daily to be sure that the wine hasn’t bubbled over into the airlock.
Step Five: Siphon to a new Fermentation Vessel

After 2 to 4 weeks in the “primary fermentation,” siphon the wine into a clean brewing vessel, leaving the sediment behind. This helps clarify the wine and oxygenates the liquid to reinvigorate the yeast.
Reinstall the airlock into this vessel and set it aside again. Check on your wine weekly to ensure there is still water in the airlock and it hasn’t evaporated.
Step Six: Secondary Fermentation
At this point, a “secondary fermentation” will start, lasting two weeks to 2 months, depending on the batch and ambient temperature. This helps refine the wine, and though fermentation is slower, secondary fermentation is where much of the flavor develops.
Step Seven: Bottle
Once the secondary fermentation is complete, it’s time to bottle. The wine is complete when it has stopped bubbling, and no bubbles go through the airlock for about 5 minutes.
Use the siphon to pull the finished wine into bottles, leaving the sediment behind. Fill your bottle of choice (a recycled wine bottle or Grolsch) and seal.
Allow the wine to age at least two weeks before drinking, preferably two months. In corked wine bottles, your wine will store for 10+ years, but with Grolsch bottles, be sure to drink it in 6 months to a year.
If you run into trouble, this troubleshooting guide from Northeast Winemaking is a helpful resource for figuring out how to address issues.
Ashley Adamant
Ashley lives in a solar and wind powered home in Vermont with her husband and two young children. She writes about gardening, foraging, DIY and all things off grid at Practical Self Reliance. Use the social links above to connect with Ashley and follow her blog!


CAN YOU PLEASE SING ME UP FOR YOUR NEWSLETTERS
Newsletter is coming soon! Thanks for asking 🙂