This post may contain affiliate links.
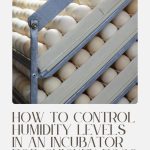

If you are a hobby farmer proud of the chicken you got from hatching, you know something about the humidity levels in incubators. Patience and care are the most important parts of maintaining the right humidity level in an
At the same time, you must know how to do the right things at the exact time. For all these reasons, we’ve created a list of questions that will answer your inquiries about proper hatching.
What is the ideal temperature and humidity for hatching chicken eggs?
The ideal temperature for hatching chicken eggs, the official recommendation, is between 99.5 and 100 degrees Fahrenheit (37,5 – 37,8 degrees Celcius). Keeping the temperature at this level will increase the chances for the chicken to develop during the hatching process.
Humidity depends on many circumstances. Humidity is crucially important for egg development, and that is why many farmers undertake serious actions to maintain the right humidity levels.

On most occasions, keeping the humidity levels around 55 % will positively impact the hatching process. Humidity should increase in the last three days of hatching, to about 65 %. This is an ideal level for the egg’s overall development in the last days of hatching. If you want to increase humidity, you can apply different techniques.
| Incubator temperature | Incubator humidity level | |
|---|---|---|
| Level | 99.5 – 100 degrees Fahrenheit 37,5 – 37,8 degrees Celcius | 55 % 65 % after day 19 |
One of the most popular techniques for increasing humidity levels is keeping hot water inside the incubators. Hot water produces hot air, which increases humidity instantly.
In this manner, you can see how humidity plays an important role in egg development. Your future chickens will get the necessary moisture during the most important three days of their egg life.
With the right temperature and humidity levels, chickens born into the world will be well-developed and healthy.
How do you control humidity in an incubator ?
The best way to control humidity in an incubator is by using a hygrometer. A hygrometer is crucial to maintain the right humidity levels as part of the tools you will need in hatching.
Before measuring humidity, prepare the incubator for the right measurement. It is not advisable to check the humidity levels right after the
Starting up your incubator for the first time
First, you should follow the directions of your incubator’s model when adding water and turning it on. If you have a forced-air
Take your hygrometer and measure the humidity at different times. In the beginning, the humidity will be more than 60%, but in the perfect situation, it should be around 55%. This is the stage when you can start putting eggs inside the incubator.

Some incubators come with built-in thermometers and hygrometers, and this is an ideal combination because you don’t have to buy the tools separately. It is enough to look at the presented values and decide whether to take the additional steps. If you use your wet-bulb thermometer, you may see a radical difference in humidity percent. On a wet-bulb thermometer, you can read 85 to 87 degrees Fahrenheit in humidity as part of the 100-degree
Whether you use a wet-bulb thermometer or preinstalled hygrometers, your
Why do eggs hatch in humidity?
Humidity is the source of moisture in eggs. When the moisture level is at a certain level, the overall development of the egg becomes more predictable. Embryo development is tightly connected to the levels of humidity in the
Ventilation allows air to circulate inside the incubator. This circulation gives the air its structure and temperature. Humidity occurs when the air is exposed to water surface areas. Only the humidity process can enrich the air with water. Thanks to the right air circulation, eggs get oxygen. At the same time, eggs remove carbon dioxide from the shell.
When the eggs hatch, they require a lot of oxygen. Therefore, you must maintain a constant supply of fresh oxygen. This is possible only if you maintain the best combination of ventilation and humidity. With the airflow increase, your egg embryos will get more oxygen, and the embryo development process will be as expected. Always think about the moisture in the air because this humidity affects the egg embryos the most. You can see the right egg hatching with the right combination of all the factors.
What if the humidity is too high in the incubator ?
If the humidity is too high in the incubator, eggs “dry out” more slowly. They will have lost too little moisture. As a result, the chick will be too large and unable to breathe inside the air space. When humidity is too high, the air space becomes too little, and we get a large chick that struggles to crack the shell and go out.
If the humidity is too high, the water loss is too little. This could be very damaging for the chick because the overall space inside the shell is significantly reduced. It is always good to maintain the right amount of humidity during the entire hatching process. Only with the optimal levels of humidity will the chick be healthy and properly balanced.
How do you reduce humidity?
One of the best ways to reduce humidity in an
If you live in a very humid area, your incubators might also attract more humidity from the outside. It is best to keep the incubators in rooms with lower natural humidity so you can control the humidity levels more accurately. Ventilation plays the most important role in the instant reduction of humidity. The right ventilation system’s selection can change how you see hatching. Choose the systems that allow you to have more venting options as part of the ventilation system.
Giving your eggs more ventilation will also increase the oxygen in the embryos. When the ventilation process is right, your embryos will have more possibilities to develop. Reduced humidity is always a good option when the high levels affect the egg cells. That is why the right measurements and proper air conditioning play a crucial role in every stage of hatching.

What happens if the humidity is too low in an incubator ?
If the humidity is too low in an
Generally, normal humidity levels are best during the entire hatching process. However, lower humidity is better than higher humidity because the air space inside the shell is crucial for embryo development. In higher humidity, this space is smaller for the chick, and the lack of air can lead to respiratory problems afterward. If the space is too big, as in the case of lower humidity, the chick will remain a little smaller, but the overall air and respiratory system won’t be affected too heavily.
To maintain safe humidity levels, you should check humidity levels with each temperature change. If you experience huge temperature changes in weather, it is best to constantly monitor the temperature and humidity in your incubators. This way, you can react if the levels go up or down during short periods. Checking your humidity and temperature levels will also give you more peace of mind in the last three days of hatching. This is when your attention must be focused on the relevant parameters inside the incubator.
How do I raise the humidity in my egg incubator ?
You can raise the humidity in your egg
One of them is placing the water container inside the
Maintaining high humidity during hatching is crucial for the overall growth of the chicks. If you manage to raise the humidity in your egg
When should the humidity in my egg incubator be raised?
You know that the three days before hatching are the right time to raise the humidity in an egg incubator. Around day 19, the first chick could start to pip, and this is the moment to raise the humidity. Go from the standard humidity level of about 55% to an increased level of about 65%.
At the same time, keep your ventilation at least a third of the way open so the new chicks can come out of the shell more easily. They will need more air and humidity in this final hatching stage. As you see them struggling to find their way through the shell, be patient and try not to give a hand too much. Many hobby farmers cannot resist the temptation to remove the shell manually when the chick starts to pop out. It is a mistake, as most chicks can find their way of popping the eggshell.

Try to keep the humidity level at the best levels during the whole process of hatching and see how your chicks go out well and strong. Humidity is the most important factor in hatching, which is why proper actions can change how you use eggs and incubators. Regularly checking humidity level, temperature, and airflow will make the hatching much more successful. In the end, you will be able to see all those little chickens coming out as the winners.
Enjoy these little creatures as they come out healthy and ready for new challenges.


