This post may contain affiliate links.
Homemade holiday gifts can be a huge hit, especially if you personalize them for your friends and family. You can increase the wow factor of a homemade gift by adding beautiful homemade labels to canned goods, homemade bagged items, or personal care products!
Homemade labels are also a must if you plan to sell your homemade goods at craft fairs or other venues.
Before choosing an option for creating homemade labels, decide what information you want or need to include on your label. This will influence the size and shape that you choose for your final product, whether you’re using a sticker, a hang tag, or other crafty options.
What should be included on a homemade label?
If you are simply giving a gift to a family member you can include whatever information you want on your homemade label. But, if you are going to sell your product, be sure to look up label laws. For example, we package honey and follow the honey labeling laws which require us to include the place where it was produced and a way to contact us as well as the weight.
If you are labeling food, do your friends and family a favor and print a date on the packaging. This is especially useful for canned goods, which have a shelf life of about one year.
Ingredients are also important so that the recipient has a clear idea of what is included in either your food or self-care product (like lip balm or lotion). Even if you aren’t selling the product, you don’t want your friends or family surprised by an ingredient they can’t tolerate.
How do I make a logo for my homemade items?
Before you create and print an actual label to stick on your homemade item, you may want to create a logo for your homestead. To make a logo yourself, I highly recommend Canva – one of the most accessible graphic design programs available online today.
To create a logo on Canva, simply create a free account, click the “Create a Design” link in the top right-hand corner, and choose a logo design. Then, you can choose a template you like and edit it to include your information and preferred graphics. Their “elements” section has tons of signs, symbols, and shapes to choose from to make the logo your own.
If Canva feels too complicated at this stage in the game, there are also several free online label-making tools. These are more limited in the options they offer, and you need to look out for services that will create your label for free but actually make you pay for it when you want to use it.
How can you create homemade labels?
Here are three ways to create homemade labels that look professional but also allow you to share your style, all without too much extra work or cost. I’ve also included links to products that I have used or would recommend as a starting place for ideas.
Option 1: Print Homemade Labels at Home with easy Online Tools
One of the easiest tools that I have found for labeling gifts, especially gifts in jars or tins, is the online template library from Avery Labels. While a computer-savvy user can use a mail merge system to create a label, the online template makes the process practically foolproof by taking out the need to worry about funky margins or figuring out how to duplicate your label in all of the rows and columns.
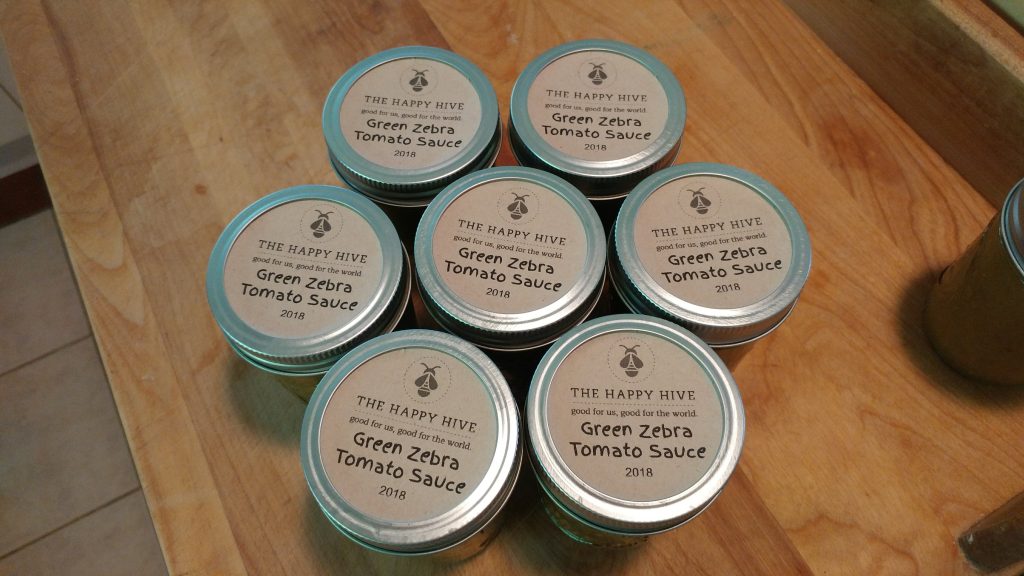
Simply buy a label that you love (I prefer brown craft paper labels and find that Avery Label #22808 is perfect for jar tops), then go to www.avery.com/templates, enter your product number, and use either a pre-formatted template or add your own logo to create a label. Save as many versions of it as you want, and print it at home for a crisp final product.
When printing a label, you can also include a graphic or an image. Again, you can use Canva to design your logo or add more shapes, words, or designs. Once your label is created in Canva, you can download it and then add it to your label layout in Avery or other label printing software services (as described above).
We used Canva to create a collection of canning labels that we sell here, in both vintage and modern styles (these may be a good option if you don’t feel ready to make your own).
Option 2: Use a Stamp for Homemade Labels
While some folks will be far enough along to have an actual logo for their products, you don’t need a fancy logo to brand your gifts. If you have a name for your homestead or an iconic image associated with your family, or if you just have an animal or shape that you love, consider using one simple stamp for all of your labels.
For example, you could adorn your beeswax products or honey with a cute bee stamp or label your homemade scarves with a ball of yarn stamp. Or, you could simply choose a stamp of a barn for anything you make at your hobby farm. Using the same stamp on all of your labels creates a uniform look and adds some rustic charm, knowing that each label was hand-stamped.
Stamps are also a great option for rustic hanging gift tags that you tie onto gifts (these don’t typically run through a printer).
Option 3: Use Craft Labels & High-Quality Markers to Create Homemade Labels
If you are confident in your lovely handwriting, you can simply use labels from the craft or office supply store and a high-quality pen or marker to create labels. While this may seem like an obvious choice, there are some ways to create labels that will ensure a better presentation. For example, instead of using a simple white mailing sticker, consider craft paper labels or chalk board labels.
As for writing utensils, a regular Sharpie will do in a pinch, but you can also consider a marker that has more of a paint-like look to it like these oil-based paint markers from Sharpie or these premium metallic markers from DealKits. Pairing a chalk sticker with a chalk marker is also a great way to create more visual appeal; you could even include the chalk marker in your gift so that your giftee can reuse the label!
Practice your handwriting and plan out your spacing before writing on the actual label, and write on the label before you put it on your gift to avoid a mistake you can’t take back.
Things to Consider When Creating Homemade Labels
One thing to consider when creating labels is whether your label makes the packaging reusable. We put labels on the top of our canning jars so that the jars themselves remain label-free and can be easily re-used with a new lid. If you are giving a gift in a bag that could otherwise be reused, you could consider a tied-on gift tag rather than a sticker so that the bag can be used again.
In addition, choose fonts for your label carefully. Make sure that it is clear enough to read and large enough to read by anyone visually impaired. I once gave my grandmother lip balm but she couldn’t read the tiny font on the packaging so she’d have no way of remembering what it was! If you are packing for sale, there may be font size requirements for the product you are selling so be sure to refer back to those label laws.
Lastly, if you want your labels to serve you year after year, consider printing labels without dates or specific product names and instead leave a space to write that in. Then, you won’t end up with a folder full of labels that say “Apple Butter, 2013” that you can’t use for anything else (speaking from personal experience!).
Carrie Williams Howe is an educational leader by day and an aspiring homesteader by night and weekend. She lives on a small homestead in Vermont with her husband, two children, and a rambunctious border collie. She blogs about her family's homestead life at The Happy Hive.

