This post may contain affiliate links.
Freezing green beans is a great way to extend your harvest over the winter! This article discussed how to freeze any type of bean (green, yellow, purple) of the “string” variety.
In our garden, green beans are often one of the first veggies to produce a plentiful harvest that has us thinking about stocking up for winter. We plant a variety of bush beans and pole beans knowing that they freeze beautifully and could easily supply us with vegetables for dinner on a weekly basis until the next year’s harvest.
How to Harvest Beans
If planted at the same time, bush beans will produce first (and in a concentrated span of about two weeks) and pole beans will produce later (and over a longer period of time as they continue to expand). Among the varieties of beans, we have found that yellow wax beans tend to be the earliest crop. They are followed close on their heels by purple and green beans.
Plan to harvest green beans about every two days in order to make the most of your harvest. Bush beans produce more new beans the more often you pick. Beans can surprise you, so you’ll want to look under all of the leaves and around the edges of the plant to make sure you get them all.
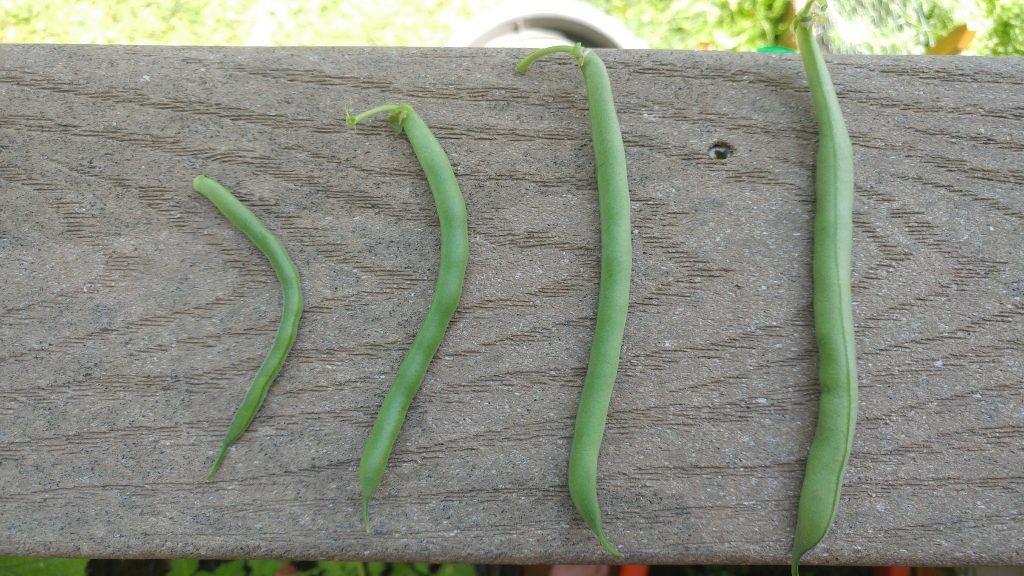
but not yet showing the inner bean shape (like bean #3 above).
Pick green beans when they are large and fairly long, but not large enough for you to see the shape of the beans inside. Beans that are too small will cook quicker than others and end up a bit mushy. Beans that are too large will end up with a stringy, tough texture. This is especially important for freezing; you’ll get the best results with uniform-sized green beans.
How to Freeze Beans
There are many ways to preserve your garden harvest to feed your family over the winter. Canning and dehydrating are excellent options, but low-acid vegetables will require a pressure canner instead of a simple water bath canning system and some vegetables simply taste better when thoughtfully frozen. Green beans fit that category.
By the end of the season these prolific providers take up the most real estate in our freezer. It is impressive how fresh frozen green beans can taste when lightly steamed and tossed with a little bit of butter and salt and pepper.
Supplies for Freezing Green Beans
While there are some options and variation for how you get green beans from garden to freezer, in general you’ll need the following:
- A large stock pot;
- A large bowl;
- A slotted spoon or handled strainer;
- Clean kitchen towels;
- A vaccuum Sealer with Freezer Bags; OR
- Resealable Plastic Bags and a Straw.
Step 1: Prepare your Supplies
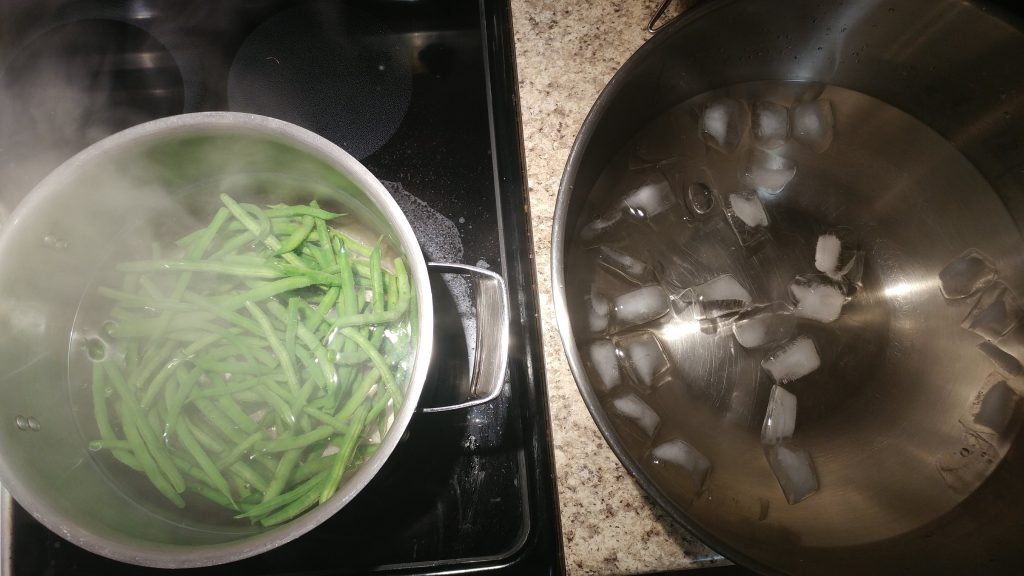
Bring a large pot of water to a boil on your stove top. We prefer to use a large stock pot just over half-way full. Fill a large bowl with cold water and ice and place next to your stove. Place clean kitchen towels on another surface.
Step 2: Blanch your Green Beans
Add green beans to boiling water in batches, making sure that all of the beans are covered with water. Set your timer for 90 seconds. Remove the beans from the water with a slotted spoon or handled strainer and immediately plunge them in the cold water to stop the cooking process.
You’ll notice that your beans change color after a quick blanch; I love how bright and vibrant green beans get, but blanching purple beans makes me a little sad because they turn green ;).
Note: Blanching veggies before freezing helps to “turn off” the enzyme that would make veggies keep ripening and go bad. The quick blanching process stops the ripening process so that your veggies will stay fresh longer after freezing.

dry them before bagging.
Step 3: Dry your Green Beans
Lay your blanched green beans out to dry on a clean kitchen towel (rolling them around to get excess moisture off of them helps, or if you have a ceiling fan in your kitchen, that works well too). Allow them to dry for 5-10 minutes or roll them up in the towel and gently press to move the drying process along.

Step 4: Bag your Green Beans
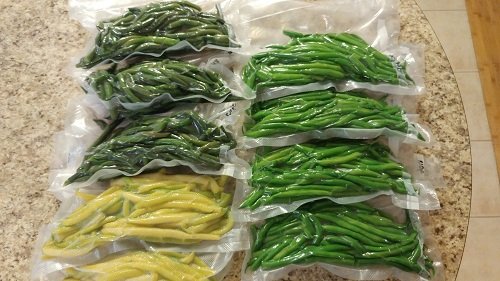
Use a vacuum sealing appliance to bag your beans in the quantities that you desire. A vacuum sealer will help to remove most of the air from your produce, thus preventing freezer burn and ice chunks. It is by far the best way to keep veggies fresh in the freezer.
If you don’t have a vacuum sealing tool, you can use a resealable freezer bag. It is important to remove as much air as possible when sealing. Try zipping up your resealable bag most of the way, then insert a straw into the bag to suck out the remaining air before completely sealing up the bag.
Step 5: Freeze your Green Beans
Your green beans are now ready for the freezer! They’ll last up to a year in the freezer and retain much of the flavor and freshness they had when harvested. Frozen Green Beans are great roasted or steamed (we do not recommend boiling as this will add more water to beans that may already be moist).

Carrie Williams Howe is an educational leader by day and an aspiring homesteader by night and weekend. She lives on a small homestead in Vermont with her husband, two children, and a rambunctious border collie. She blogs about her family's homestead life at The Happy Hive.

